Docco Manual
An introduction to every feature, with step-by-step instructions
0. About this app
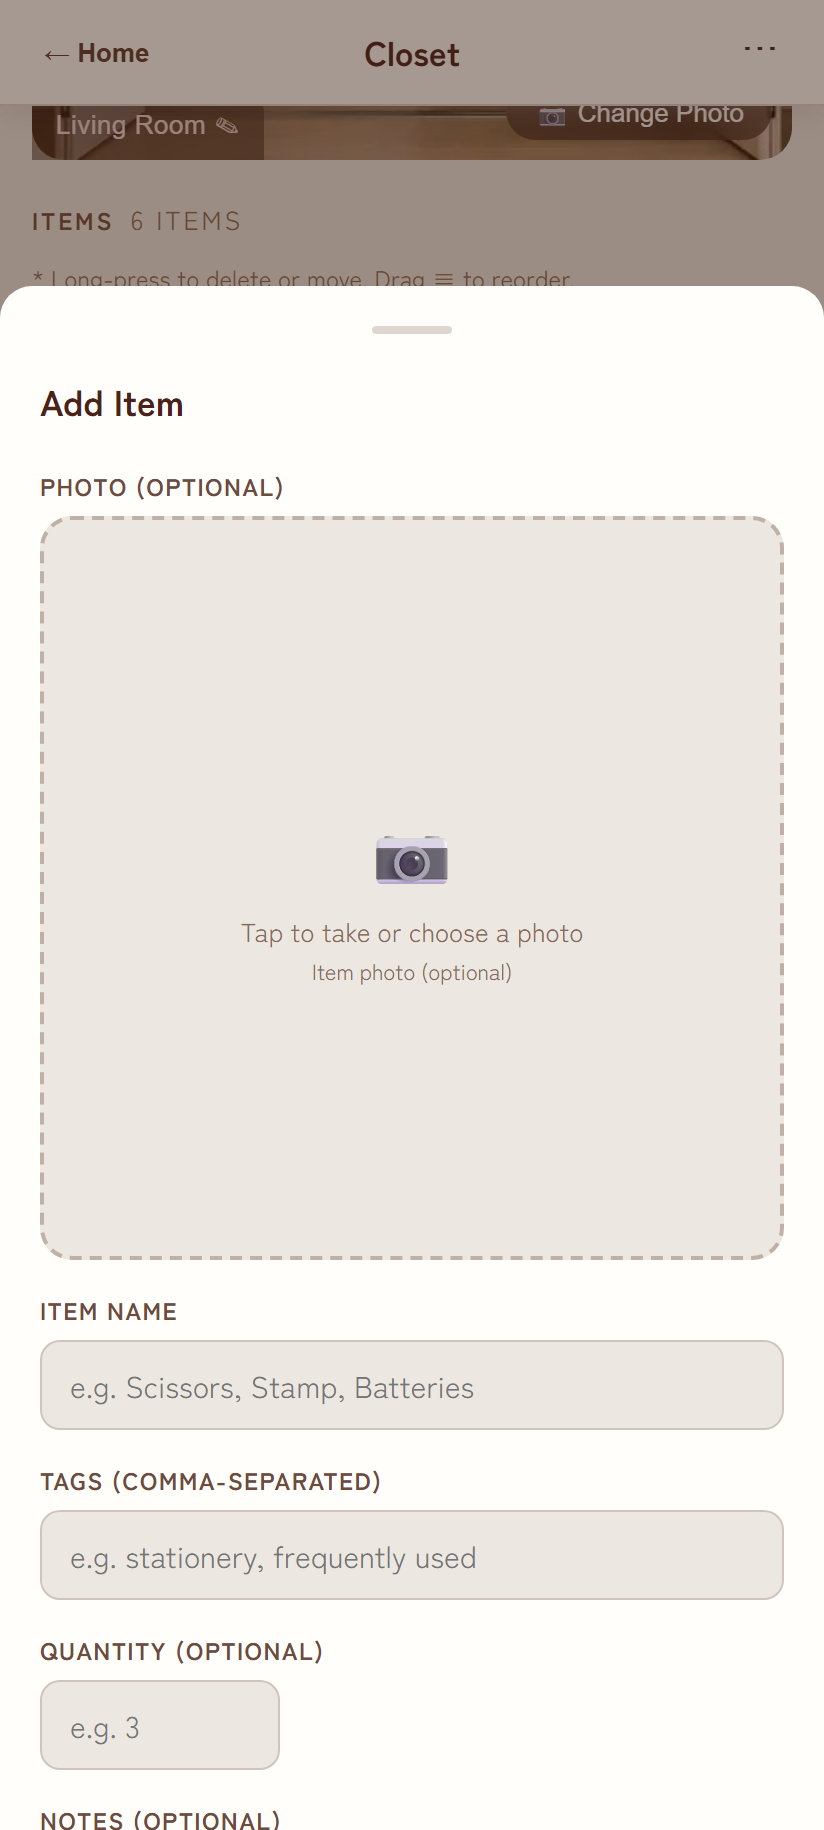
Docco is a smartphone storage-management app that lets you record where you put things and what they are, with photos, so you can find them again later by searching. Its tagline is "~ Stop losing things ~".
A simple two-level structure
All of Docco's data is organized into just two levels: "Locations" and "Items". There are no nested folders.
| Concept | Meaning | Information it can hold |
|---|---|---|
| Location | The storage container itself, such as "Closet" or "Under the sink" | Name / Category / 1 photo |
| Item | Something stored in that location. Always belongs to exactly one location | Name / Tags (multiple) / Quantity / Notes / 1 photo |
| Category | A loose label for classifying locations. Freely editable | A list of text strings (3 defaults) |
Your data is saved to your own Google Drive
Docco has no dedicated server of its own. Both your data and your photos are saved to a Docco folder inside the Google Drive of the account you sign in with. The developer cannot see your data. If you switch phones, simply sign in with the same Google account and everything picks up right where you left off.
Requirements
| Item | Details |
|---|---|
| Available as | Android app (Google Play) / Web app (PWA) |
| Supported OS | Android 7.0 or later |
| Required account | Google Account (needed to use Google Drive) |
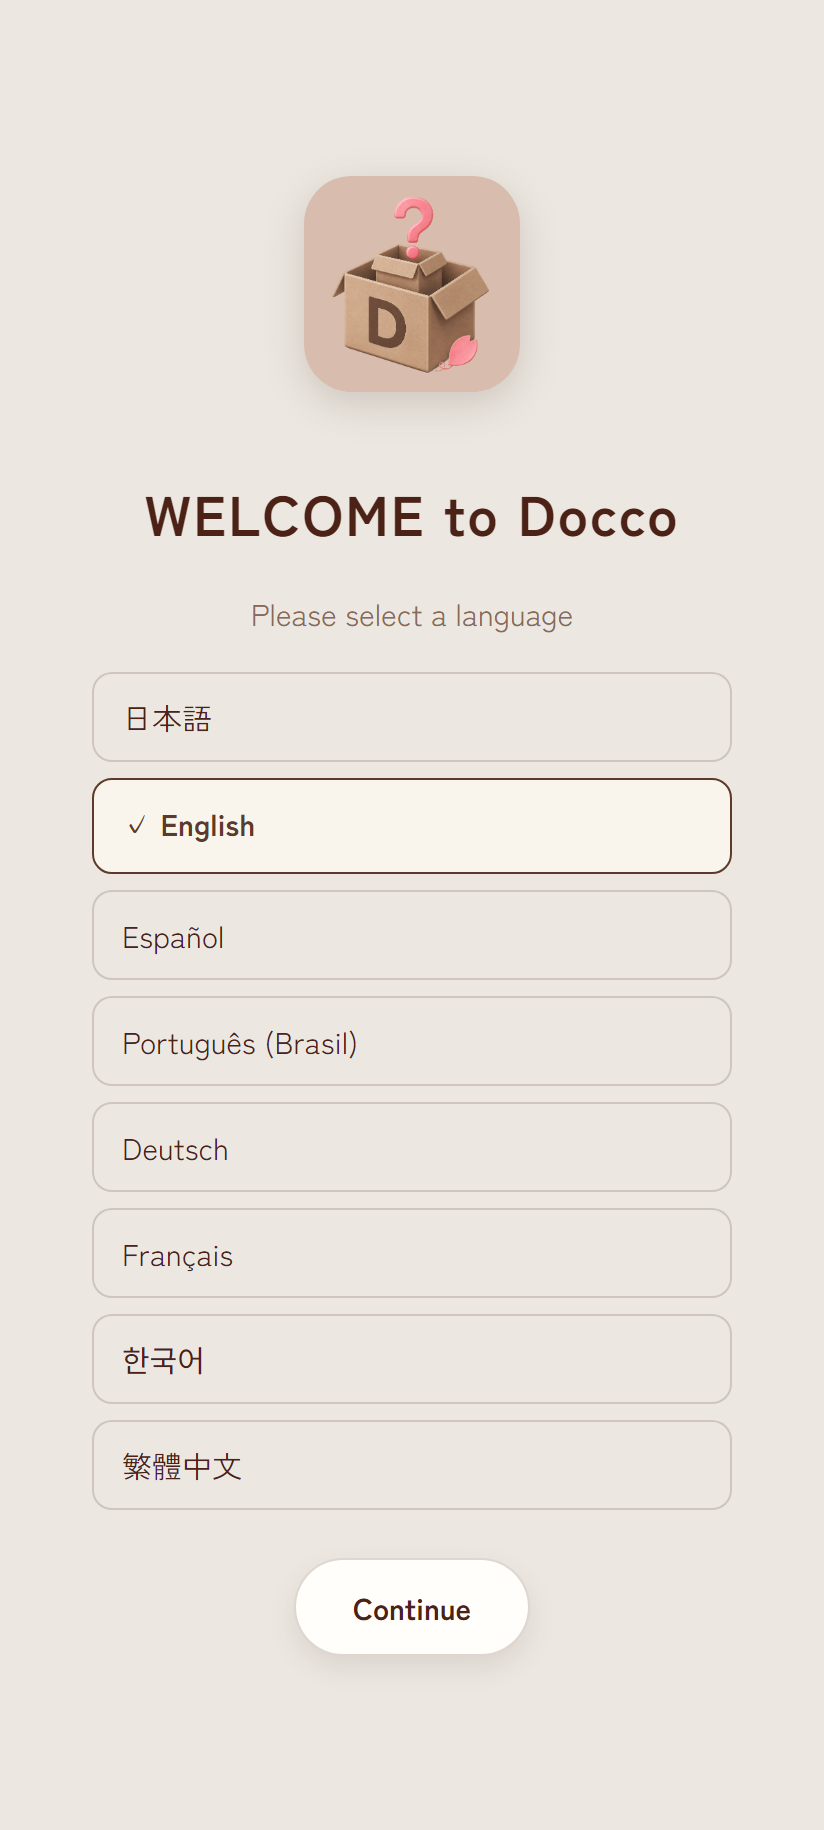
| Supported languages | Japanese, English, Spanish, Portuguese (Brazil), German, French, Korean, Traditional Chinese (8 languages total) |
Common gesture: swipe down to close a modal
When adding or editing a storage location or item, editing categories, choosing a language, or opening any other screen that slides up from the bottom, you can also close it by swiping the handle at the top downward with your finger. Just like tapping outside the modal, your input is not saved.
1. First launch
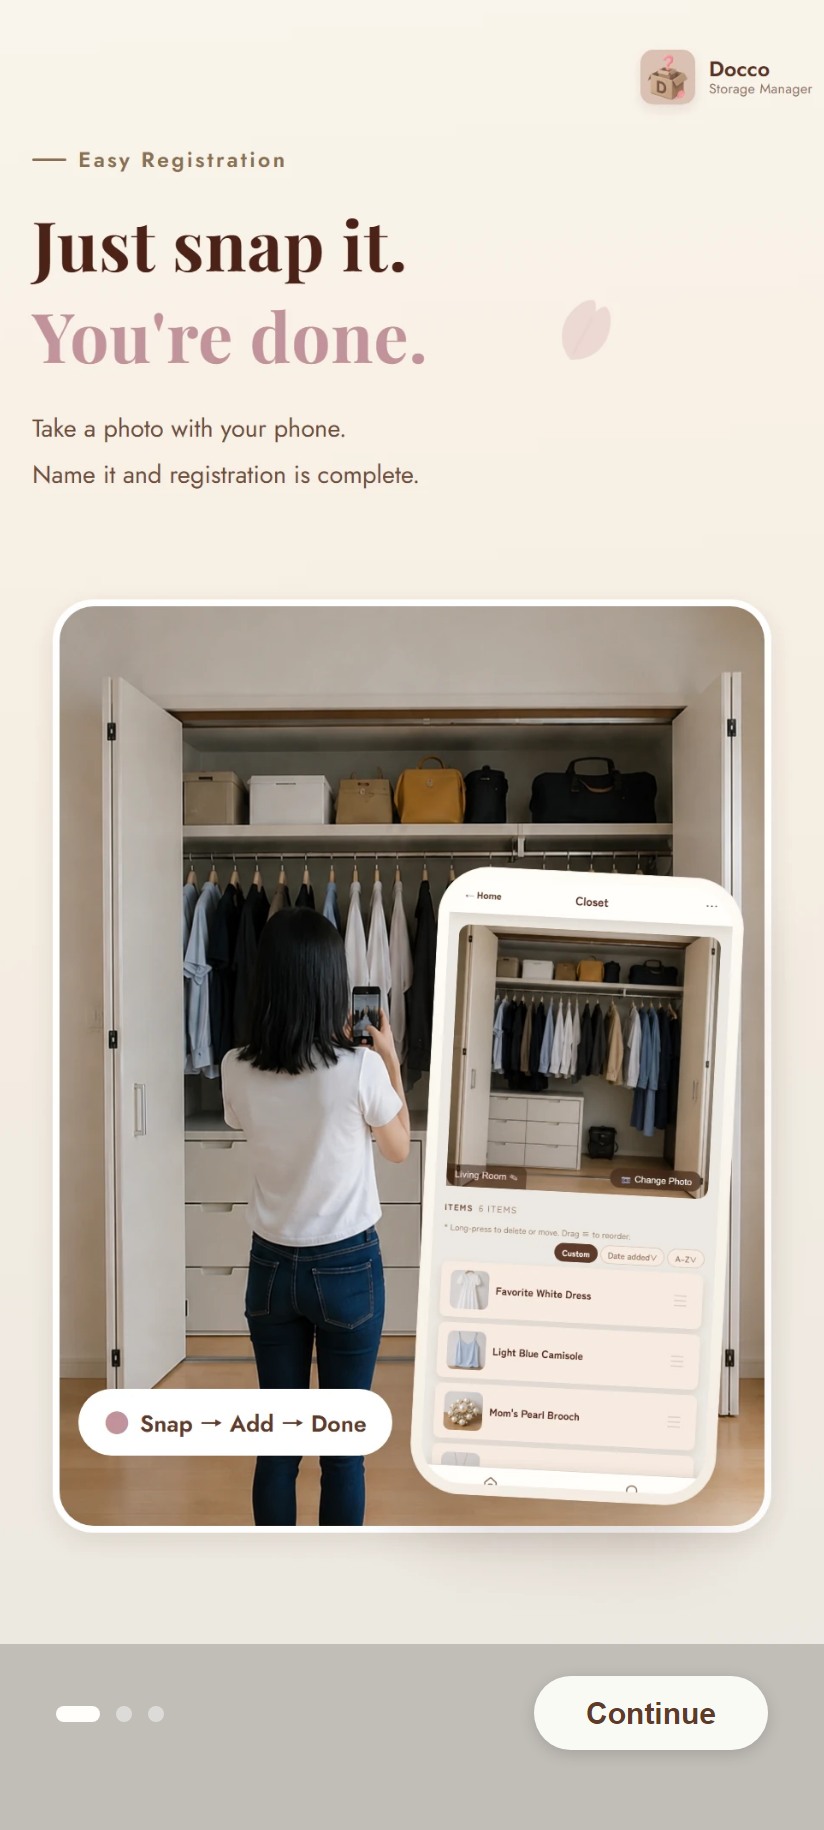
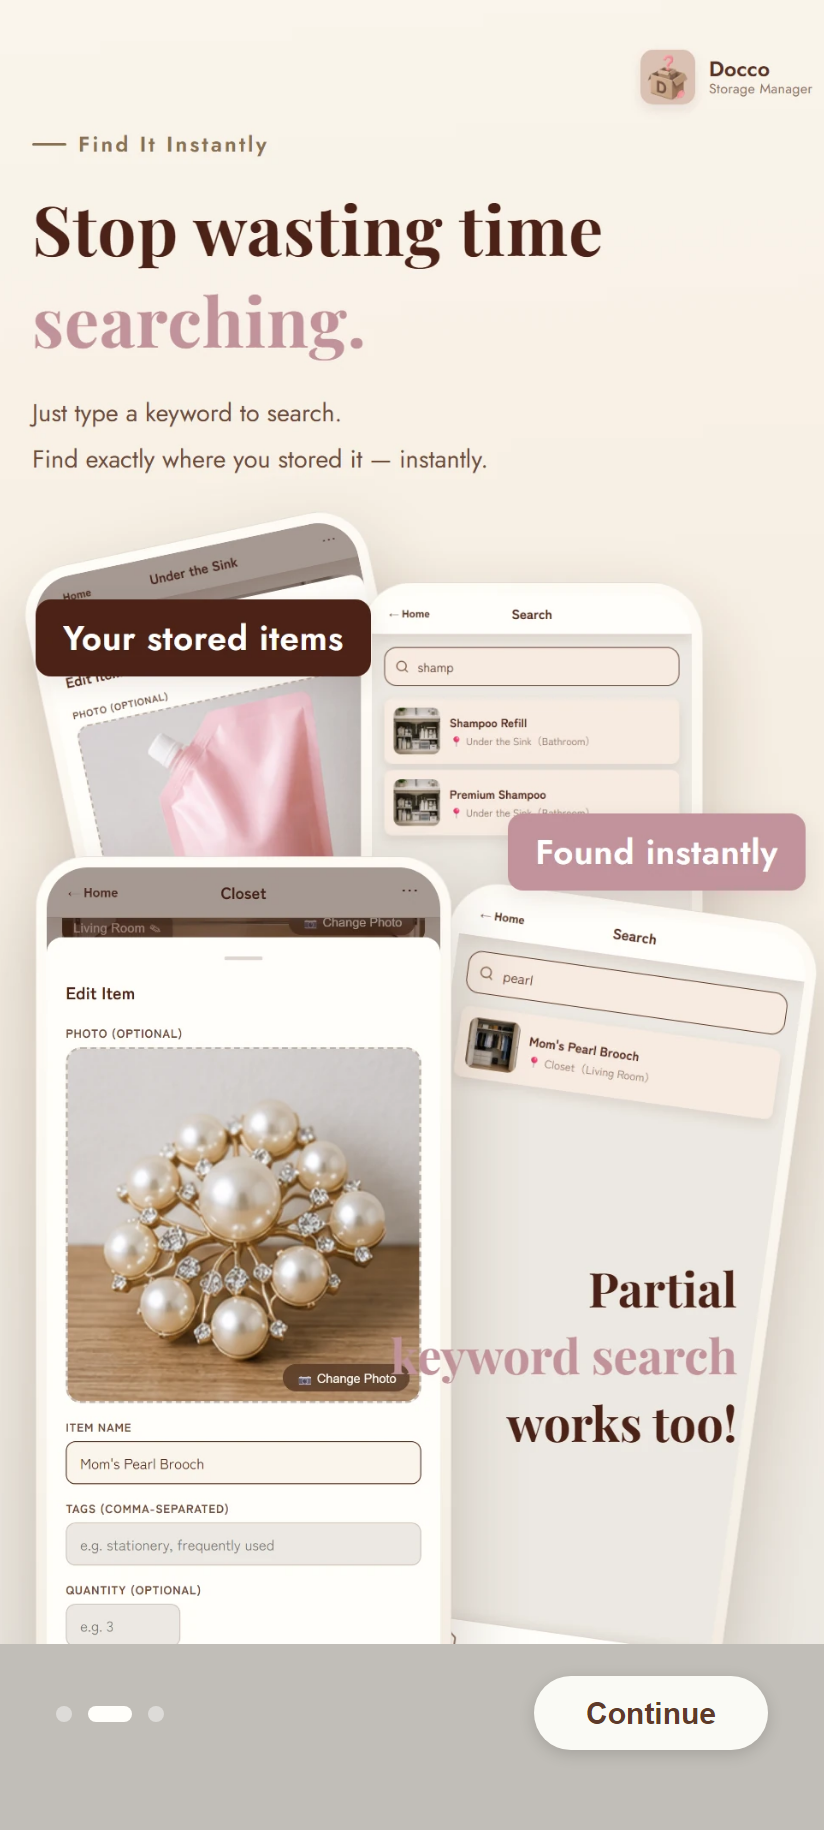
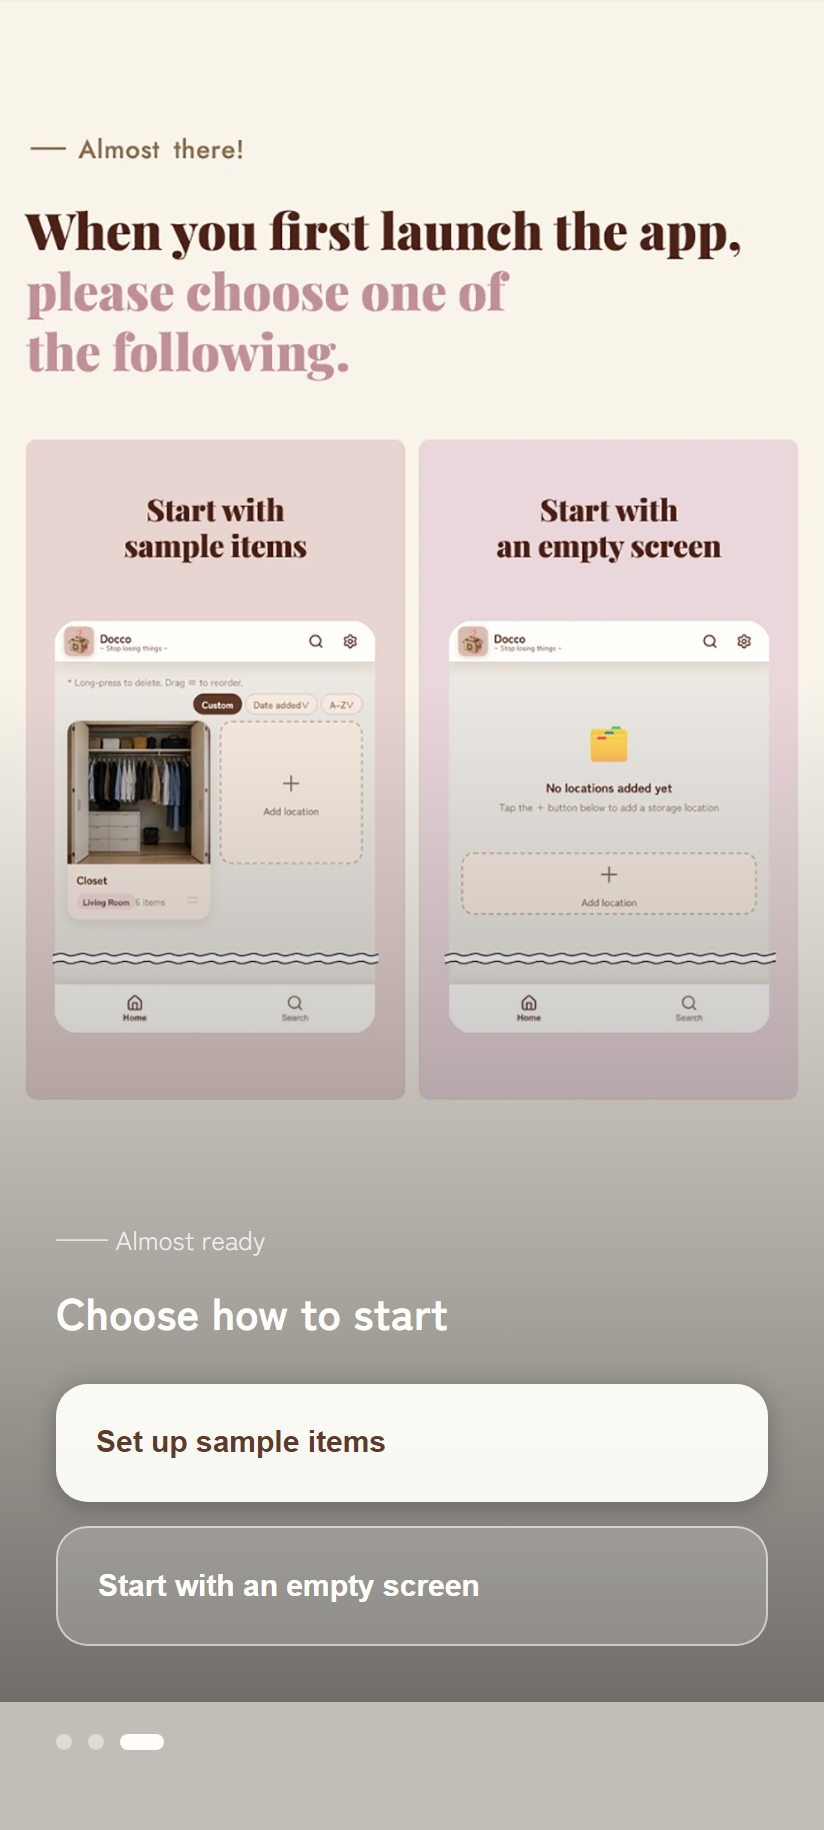
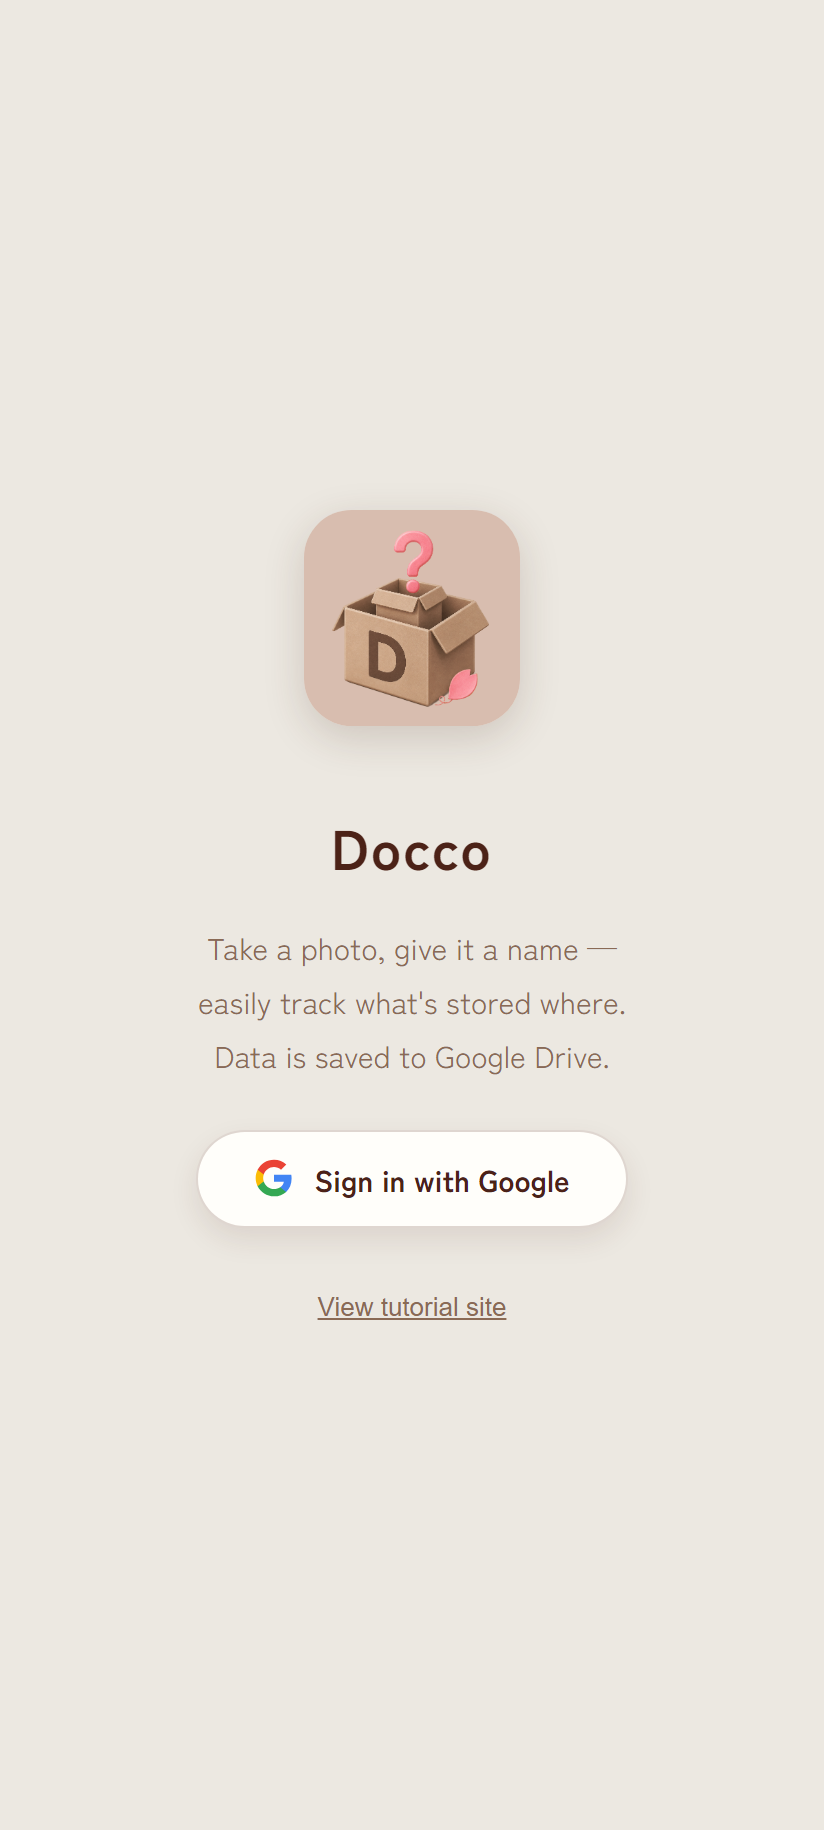
The first time you launch the app, you'll go through "Select language → 3-slide tutorial → Sign in", in that order. This won't appear again after the first time.
Navigating the tutorial
- Use the Continue button at the bottom, or swipe left/right to move between pages.
- The Android back button also takes you back one page.
Setting up sample items
- Choosing Set up sample items automatically creates one "Closet" location with 6 items inside it (each with a photo) right after you sign in. This is sample data to help you get a feel for the app, and you can delete it normally whenever you don't need it anymore.
- Choosing Start with an empty screen starts you off with nothing registered.
Signing in
- Tap Sign in with Google.
- Google's account picker appears — choose the account you want to use.
- You'll be asked to grant access to Google Drive — allow it (this permission only lets Docco access files it created itself).
- Once sign-in completes, the home screen appears.
2. Home screen
2.1 Screen layout
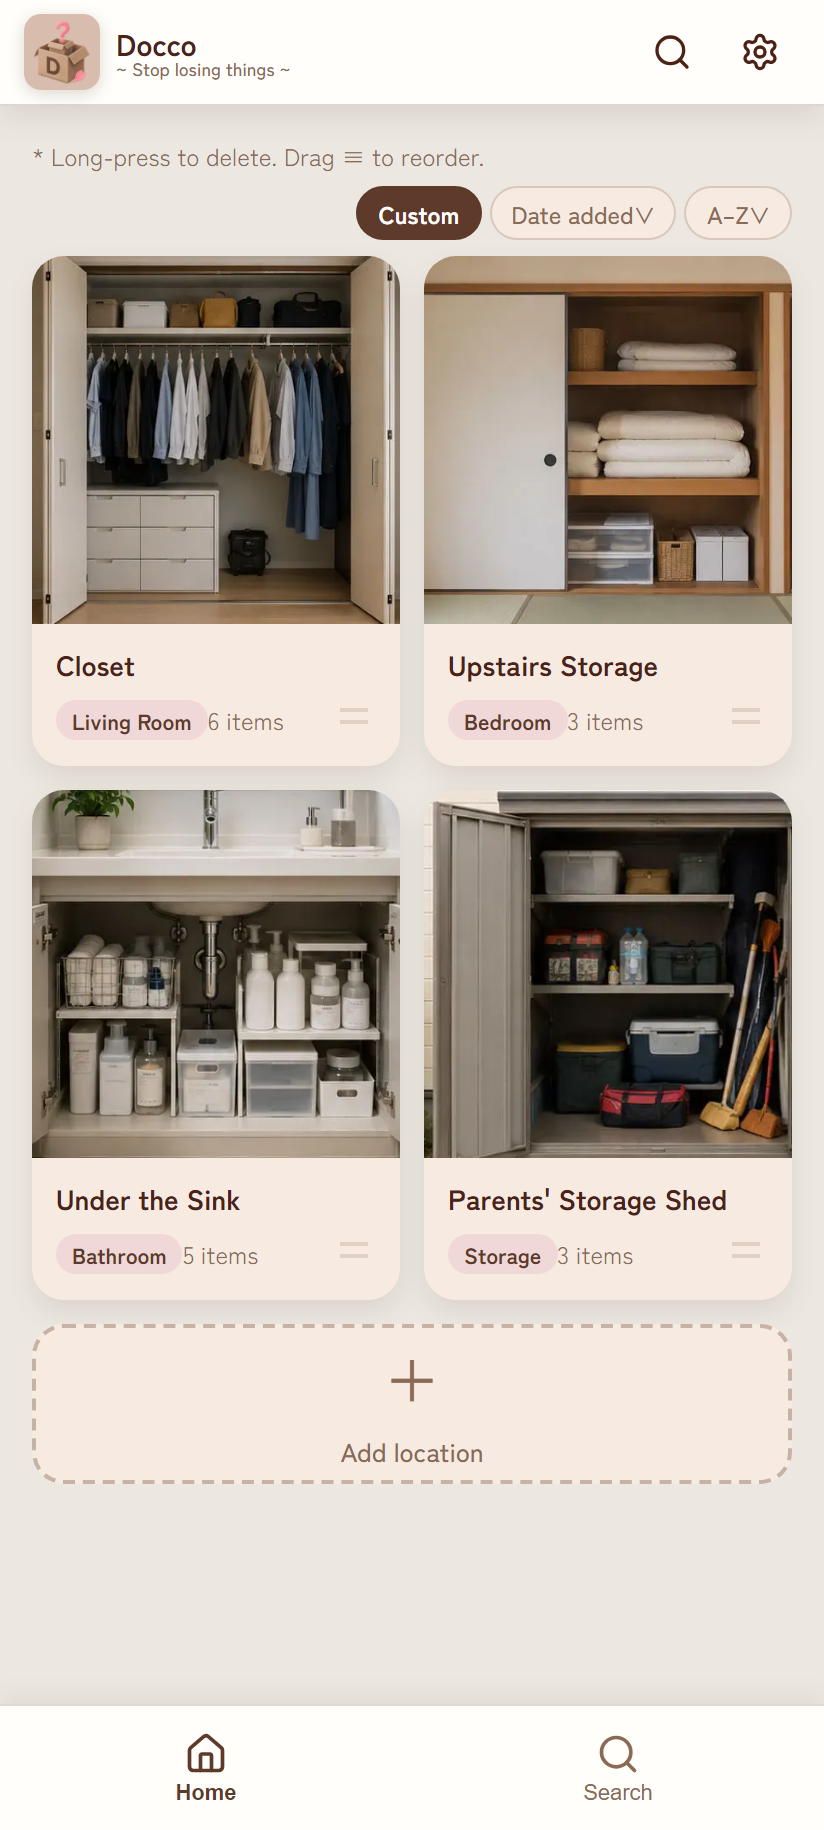
| Location | Element | Details |
|---|---|---|
| Header | App logo & title | "Docco / ~ Stop losing things ~" |
| 🔍 Magnifying glass icon | Opens the search screen | |
| ⚙️ Gear icon | Opens the settings menu | |
| Body | Sort bar | A hint text plus three buttons: CustomDate addedA–Z |
| Location card | Photo / location name / category badge / item count / reorder handle ≡ | |
| + Add location | The dashed-outline button at the end of the card list | |
| Footer | Home / Search | A 2-tab bottom navigation bar |
2.2 Adding a storage location
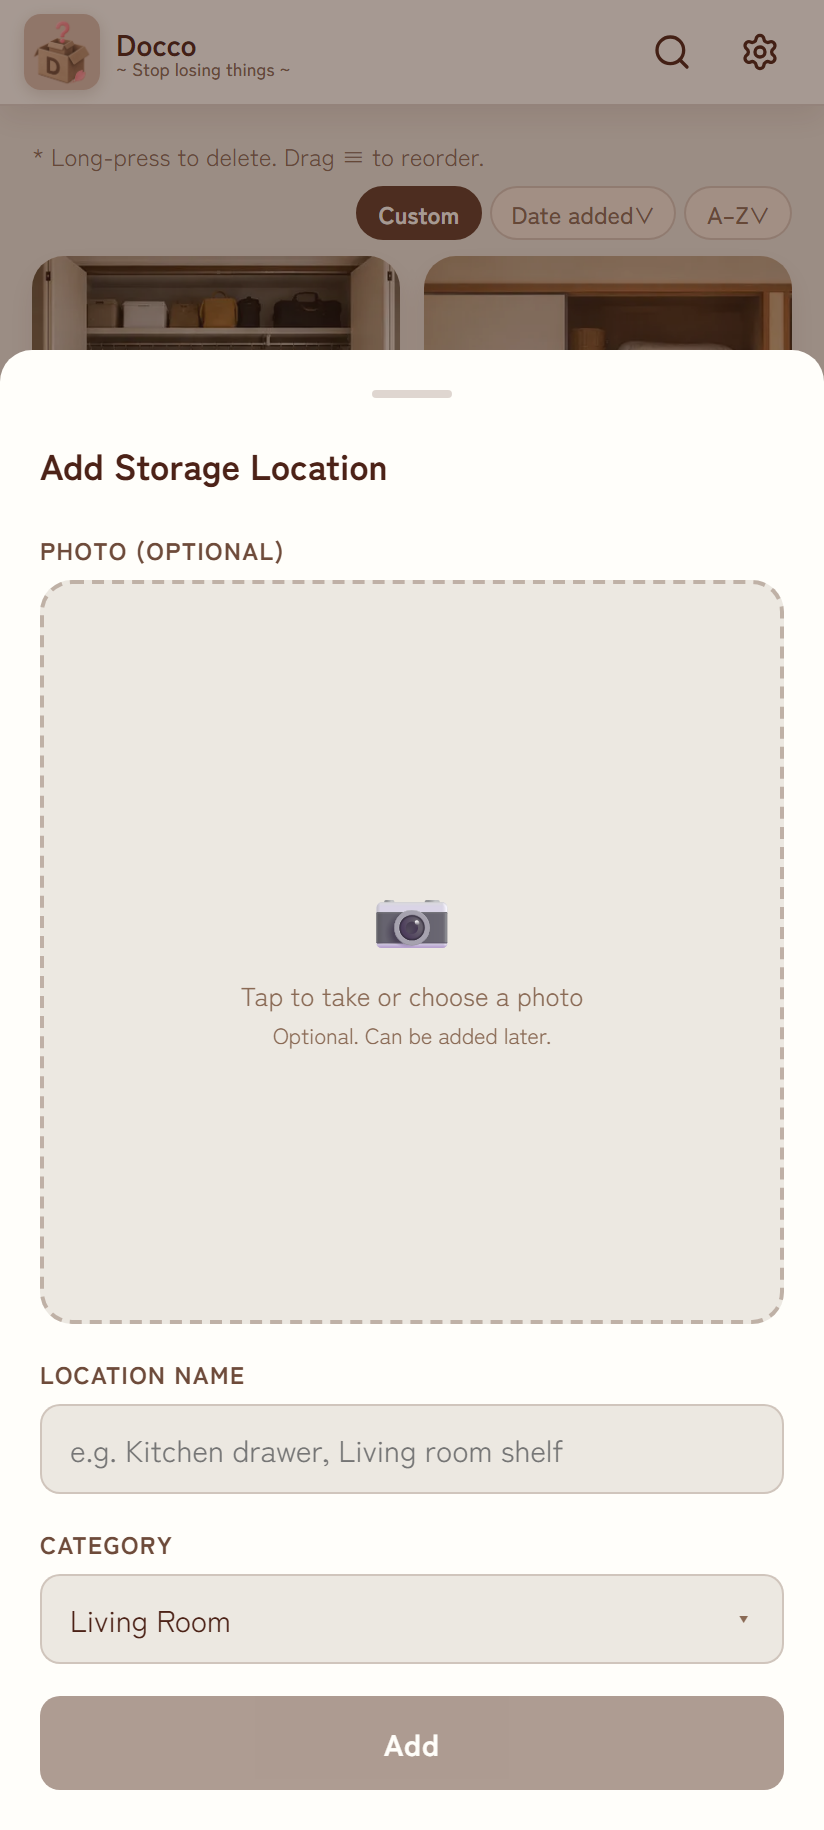
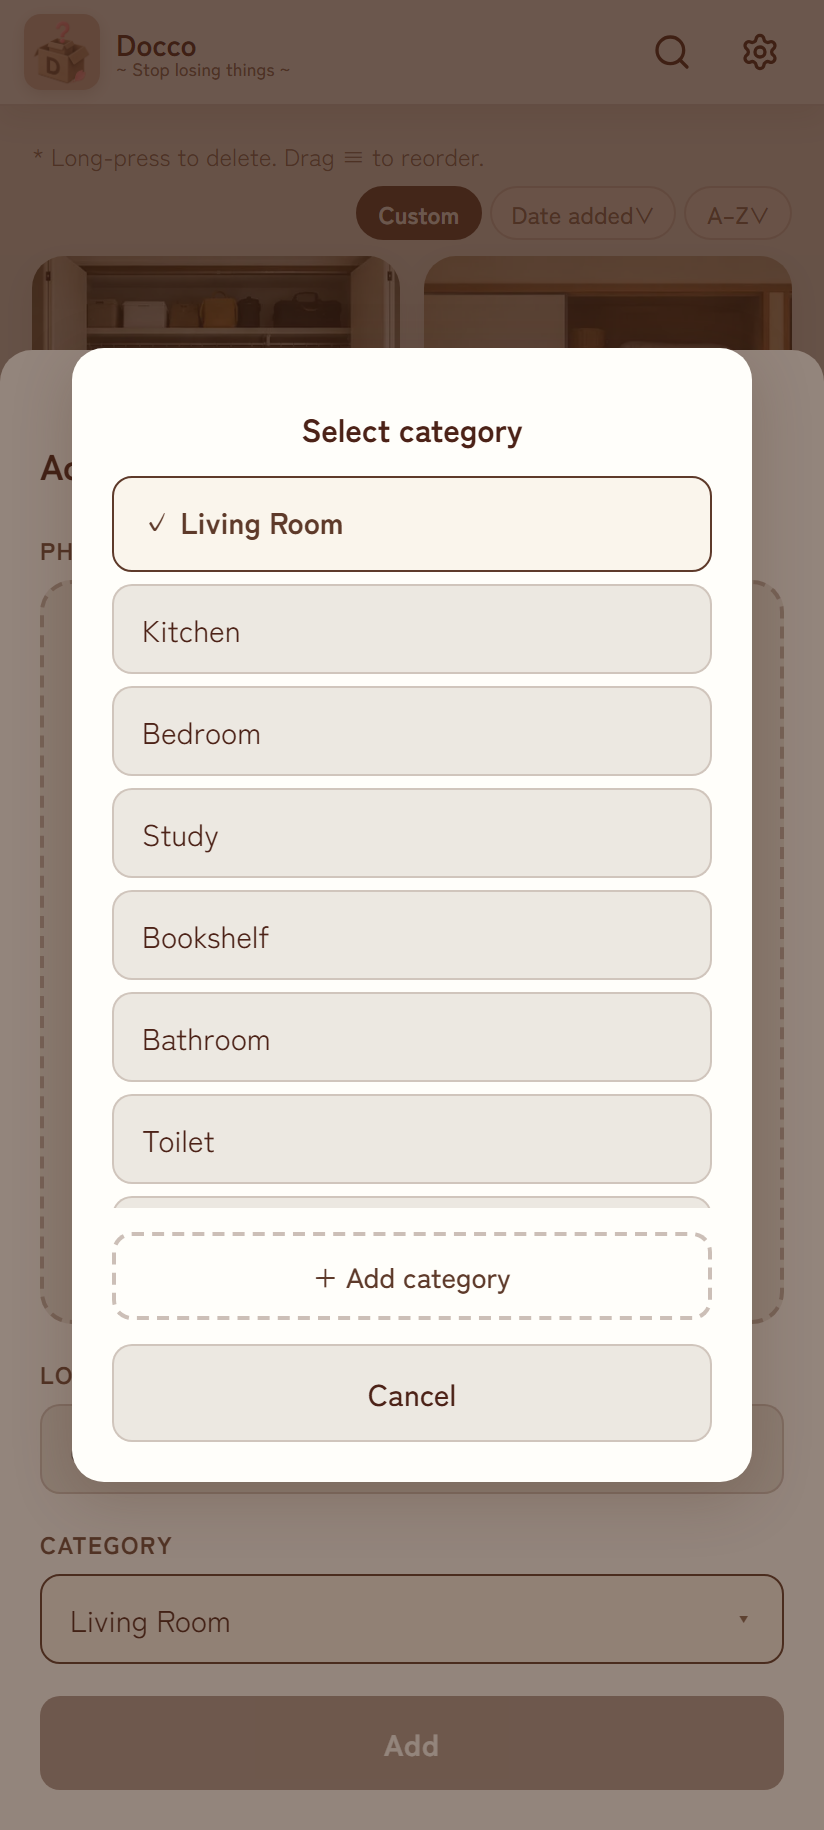
- Tap + Add location on the home screen.
- Tap the photo area to launch the camera and take a photo showing the whole storage location (you can skip this and add it later).
- Enter the location name (e.g. "Kitchen drawer, right side" or "Living room shelf, top"). A name is required — you can't tap Add until you enter one.
- Tap the category field to pick a classification. If the one you want isn't listed, create it on the spot with + Add category.
- Tap Add to save — it's added to the card list on the home screen.
2.3 Changing the sort order
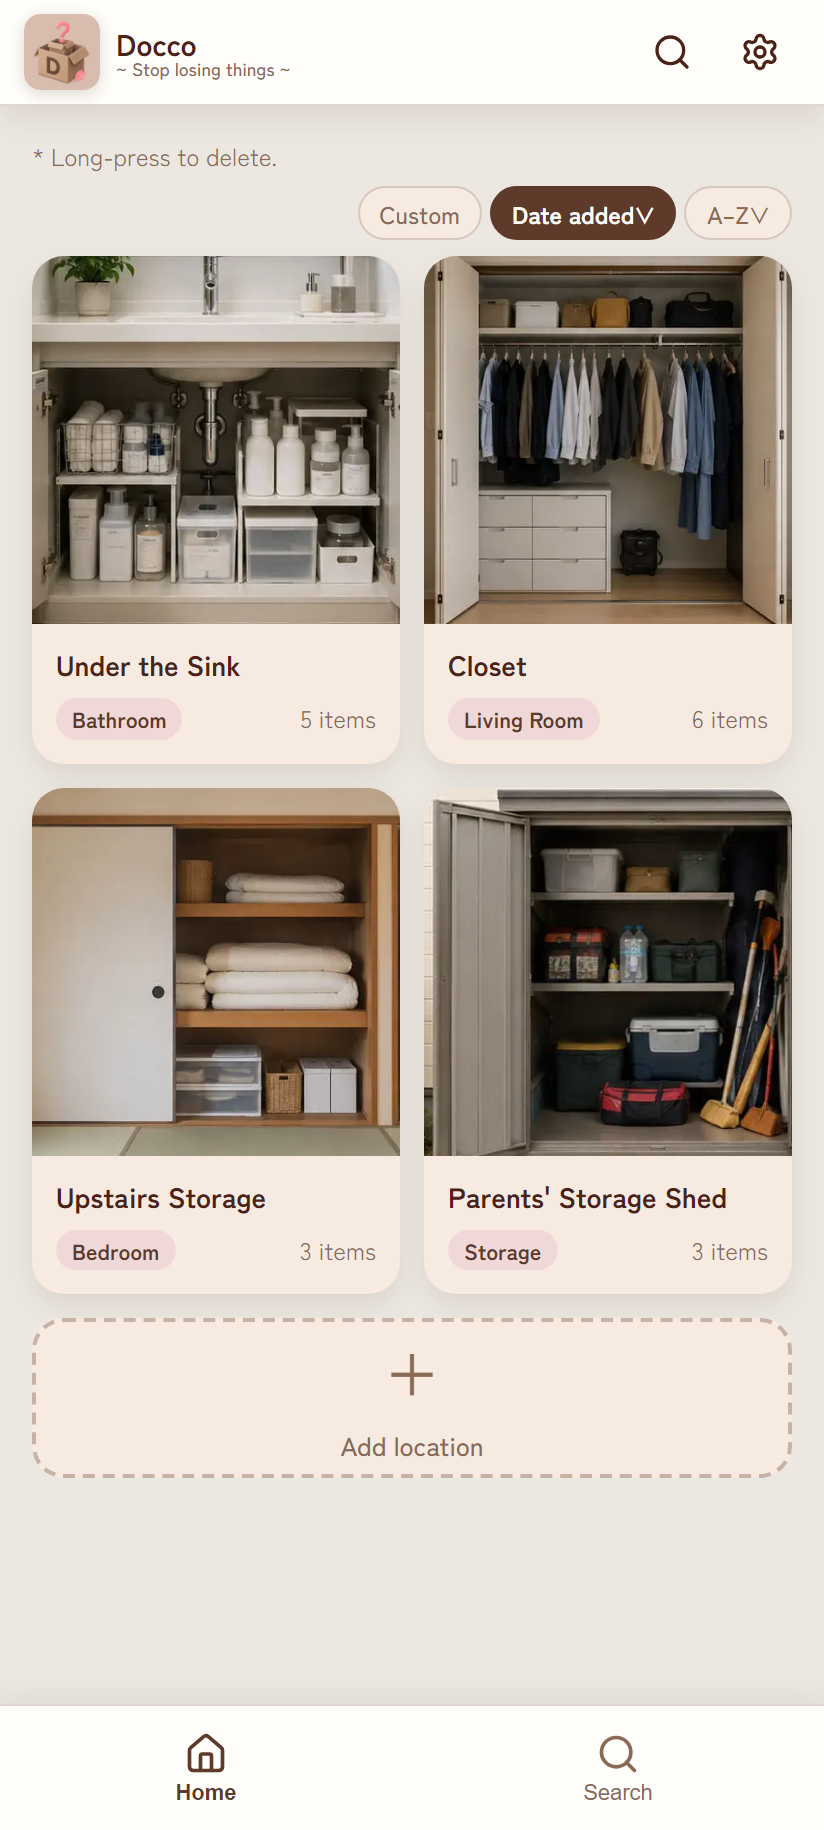
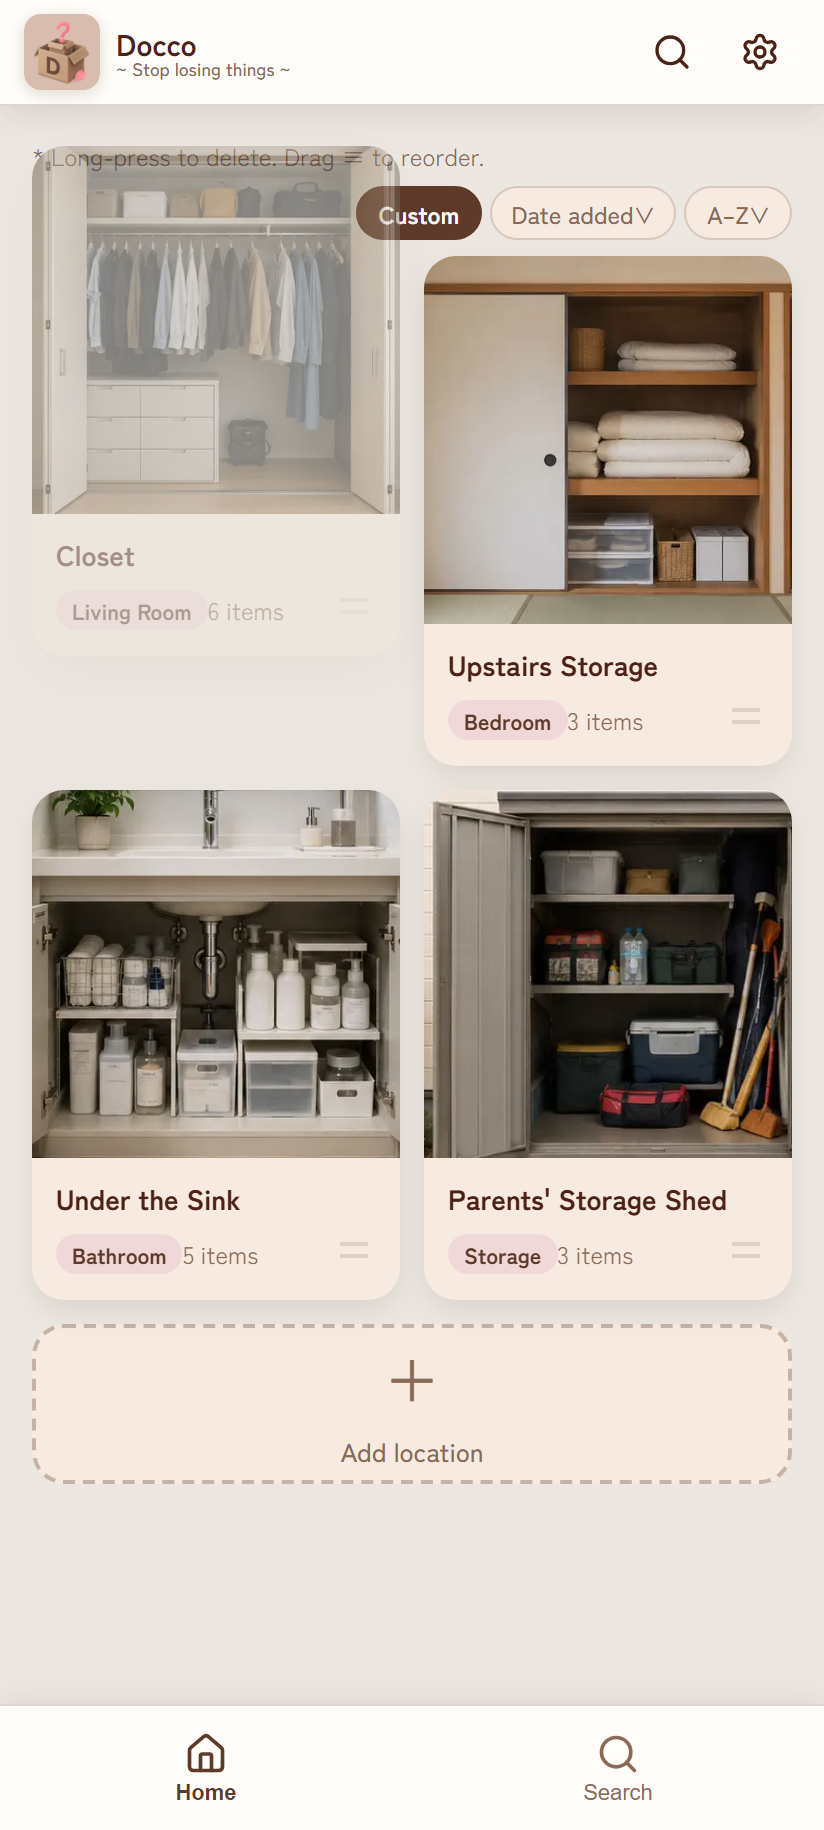
≡ handle in the bottom-right of a card, then drag it to move the card wherever you like (only while in Custom order).| Sort order | Behavior | Drag to reorder |
|---|---|---|
| Custom | Your own order. The default | Available (the ≡ handle appears) |
| Date added ∨ / ∧ | Ascending/descending by creation time. Tap again to reverse | Not available (the handle disappears) |
| A–Z ∨ / ∧ | Alphabetical by name (following the display language's collation order). Tap again to reverse | Not available |
2.4 Long-press menu & deletion
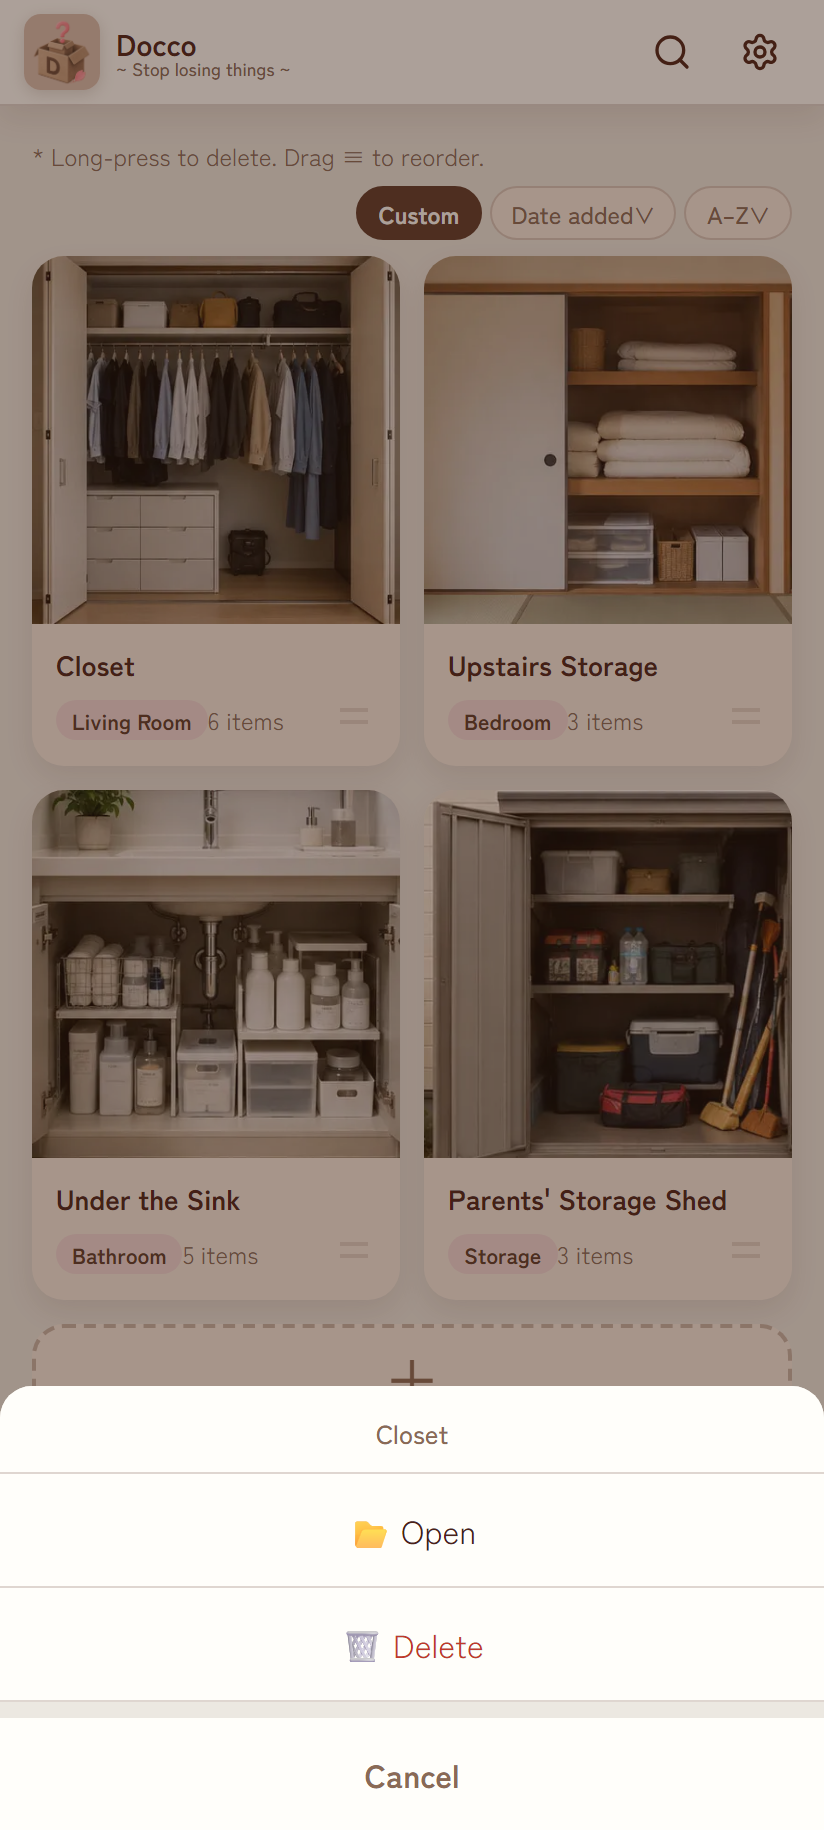
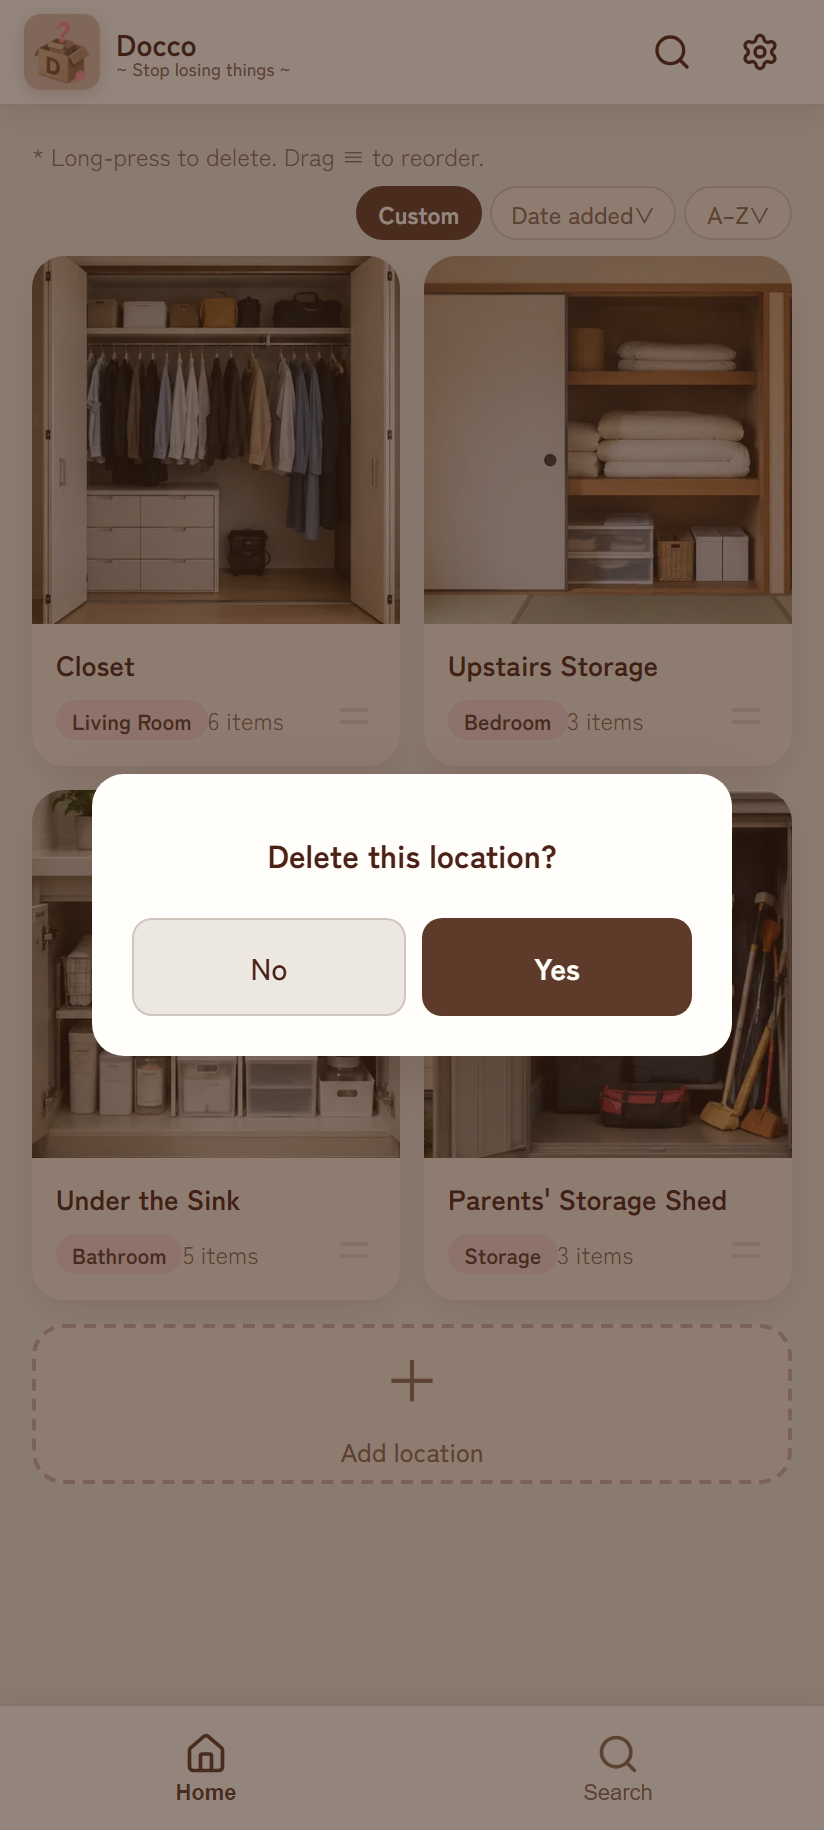
Long-pressing a card for about 0.5 seconds opens the action sheet (moving your finger more than 8px cancels this and starts a drag-to-reorder instead).
Confirmation flow when deleting a location
(○ items will be deleted)→ Also delete photos from Google Drive?
- The third step offers three choices: Back / Keep photos / Delete all.
- Choosing Keep photos removes the location from the app, but the photo files remain on Google Drive.
- Even choosing Delete all only moves photos to Google Drive's Trash — they aren't erased immediately. If you delete something by mistake, you can restore it from Drive's Trash.
- If neither the location nor any of its items has a photo, the third step is skipped and deletion finishes at step 2.
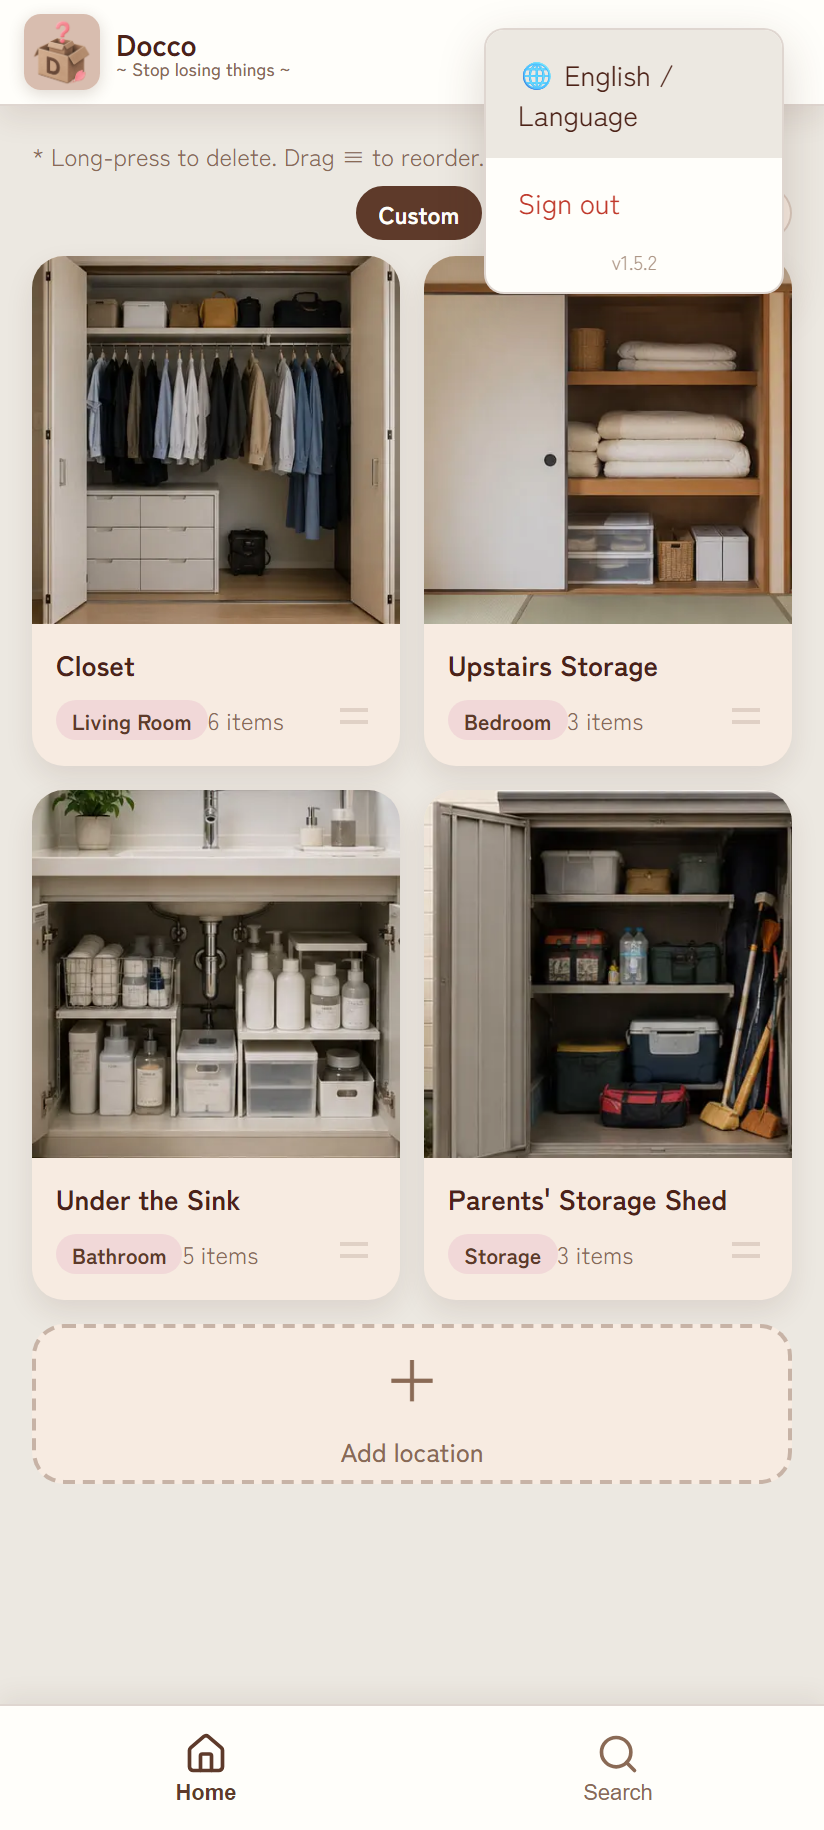
2.5 Settings menu
Open it from the gear icon at the top right of the header. Tap outside the menu to close it.
| Item | Details |
|---|---|
| 🌐 English / Language | Opens the language switch modal (see Chapter 7) |
| Sign out | Disconnects from Google and returns to the sign-in screen. Your data on Drive is not deleted |
| Account name | Shows the email address of the signed-in Google account, in small text |
| Version | Shows the actual build version currently running |
3. Location detail screen
3.1 Screen layout
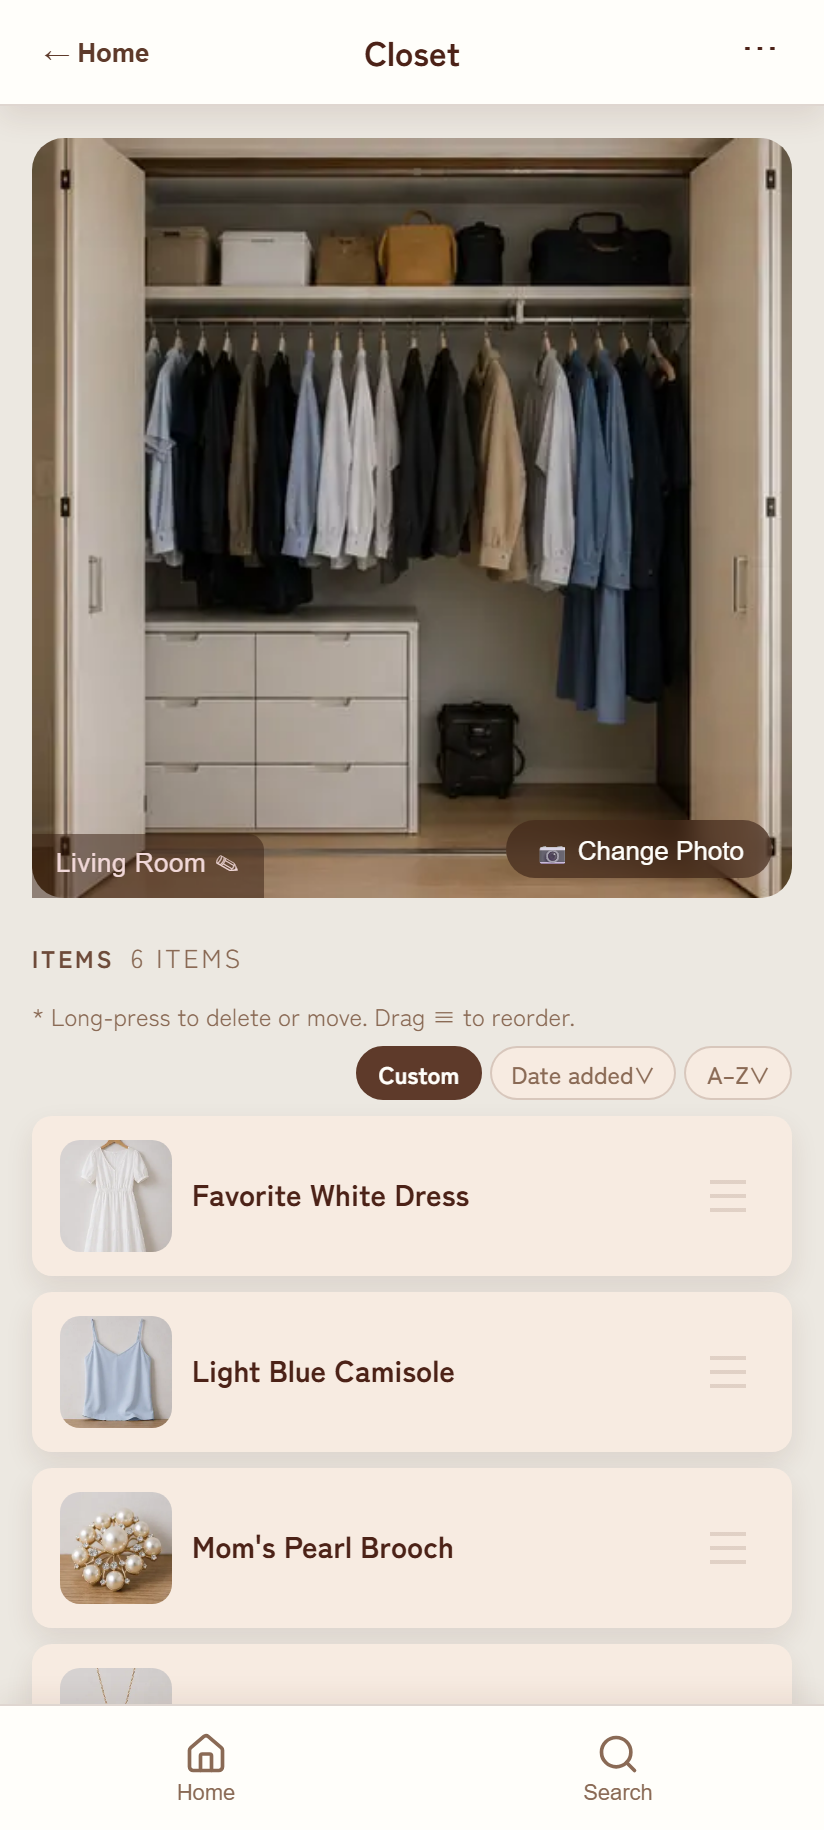
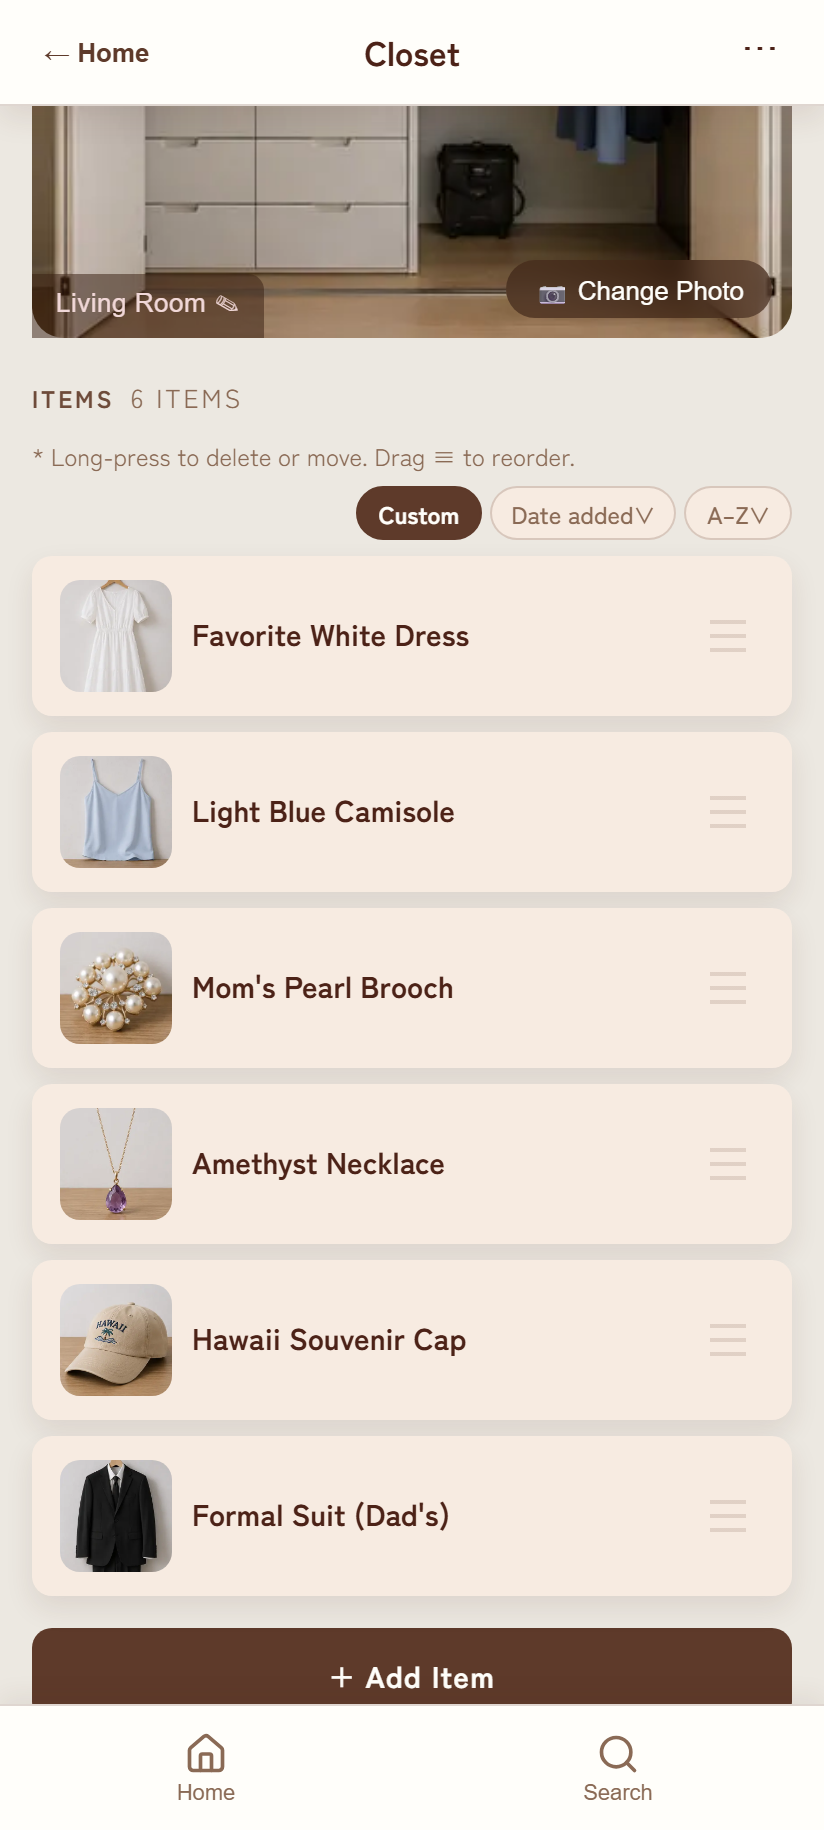
| Location | Element | Details |
|---|---|---|
| Header | ← Home | Returns to the home screen |
| Location name | Tap to edit the name right there (inline editing) | |
| ⋯ | Menu with "Rename" and "Delete this location" | |
| Body | Large photo | The location's registered photo. A placeholder if none is set |
| Two buttons over the photo | Bottom-left = category badge (tap to change) / bottom-right = 📷 Change Photo (📷 Add Photo if none is set) | |
| Items (n) | An item-count heading plus a sort bar (the three buttons only appear when there are 2 or more items) | |
| Item row | Photo thumbnail, name, quantity badge, tags, notes, reorder handle ≡ | |
| Bottom | + Add Item | Opens the add-item modal |
3.2 Changing the name, photo, and category
| What to change | How |
|---|---|
| Location name | Tap the name in the header → type → confirm with Enter or by tapping outside the field (same as ⋯→Rename) |
| Location photo | 📷 Change Photo at the bottom-right of the photo → camera opens → shoot. While replacing it, the new photo is shown as a preview first |
| Category | Tap the category badge at the bottom-left of the photo → pick from the list |
| Delete the whole location | ⋯→Delete this location (same confirmation flow as 2.4) |
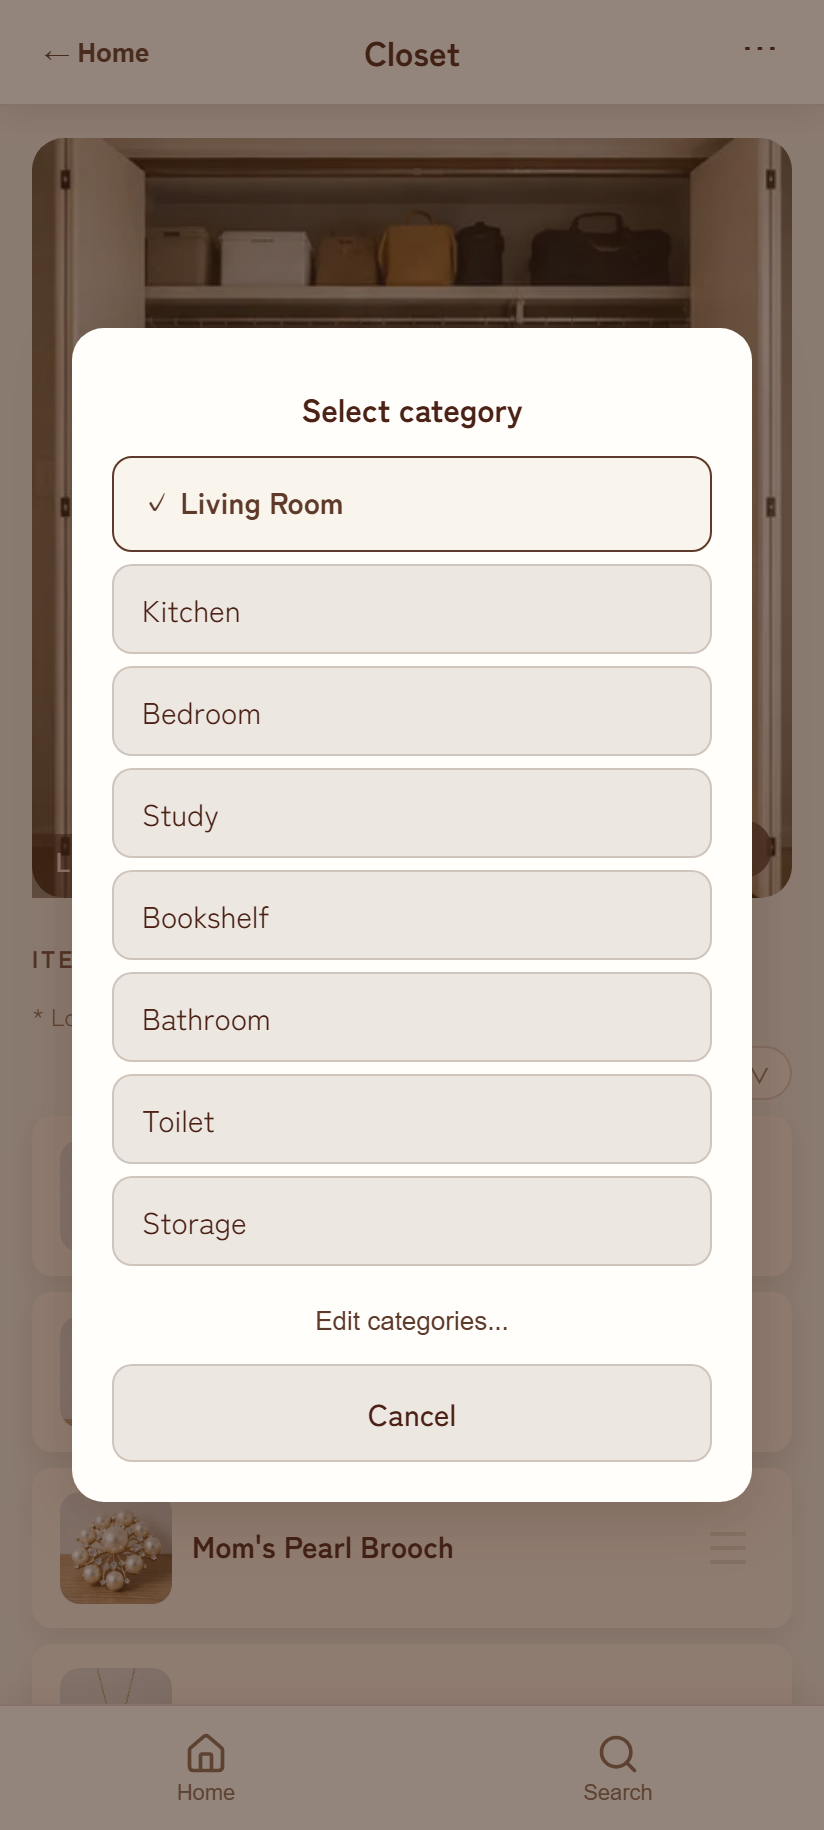
✓ appears next to the current category. Manage the categories themselves from Edit categories... below.3.3 Adding an item
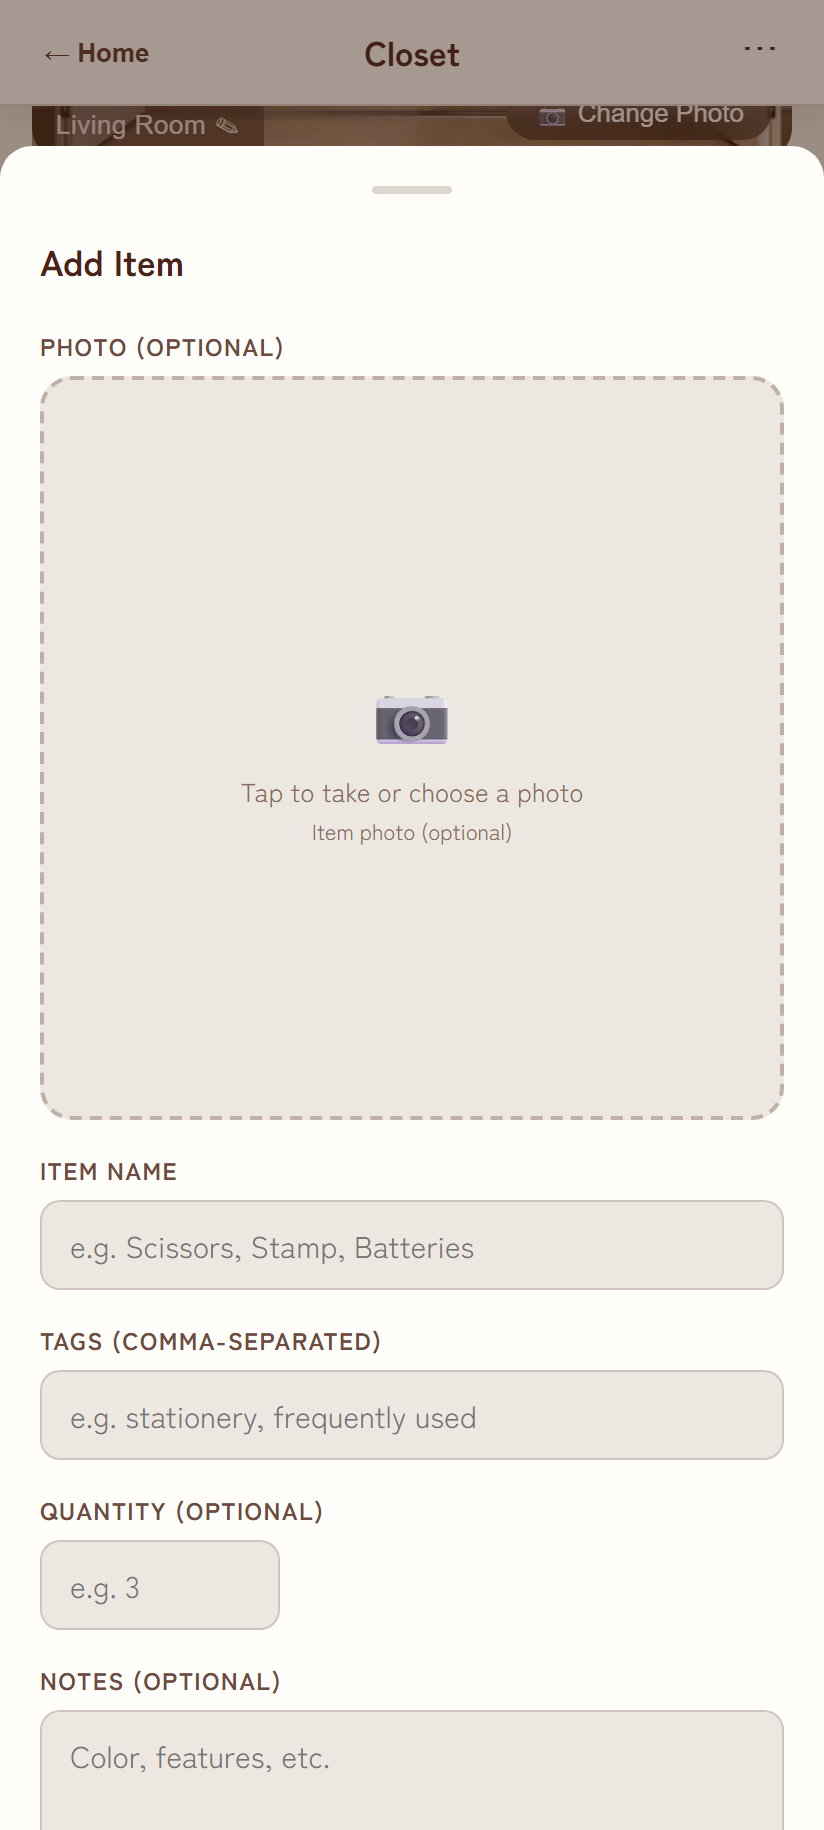
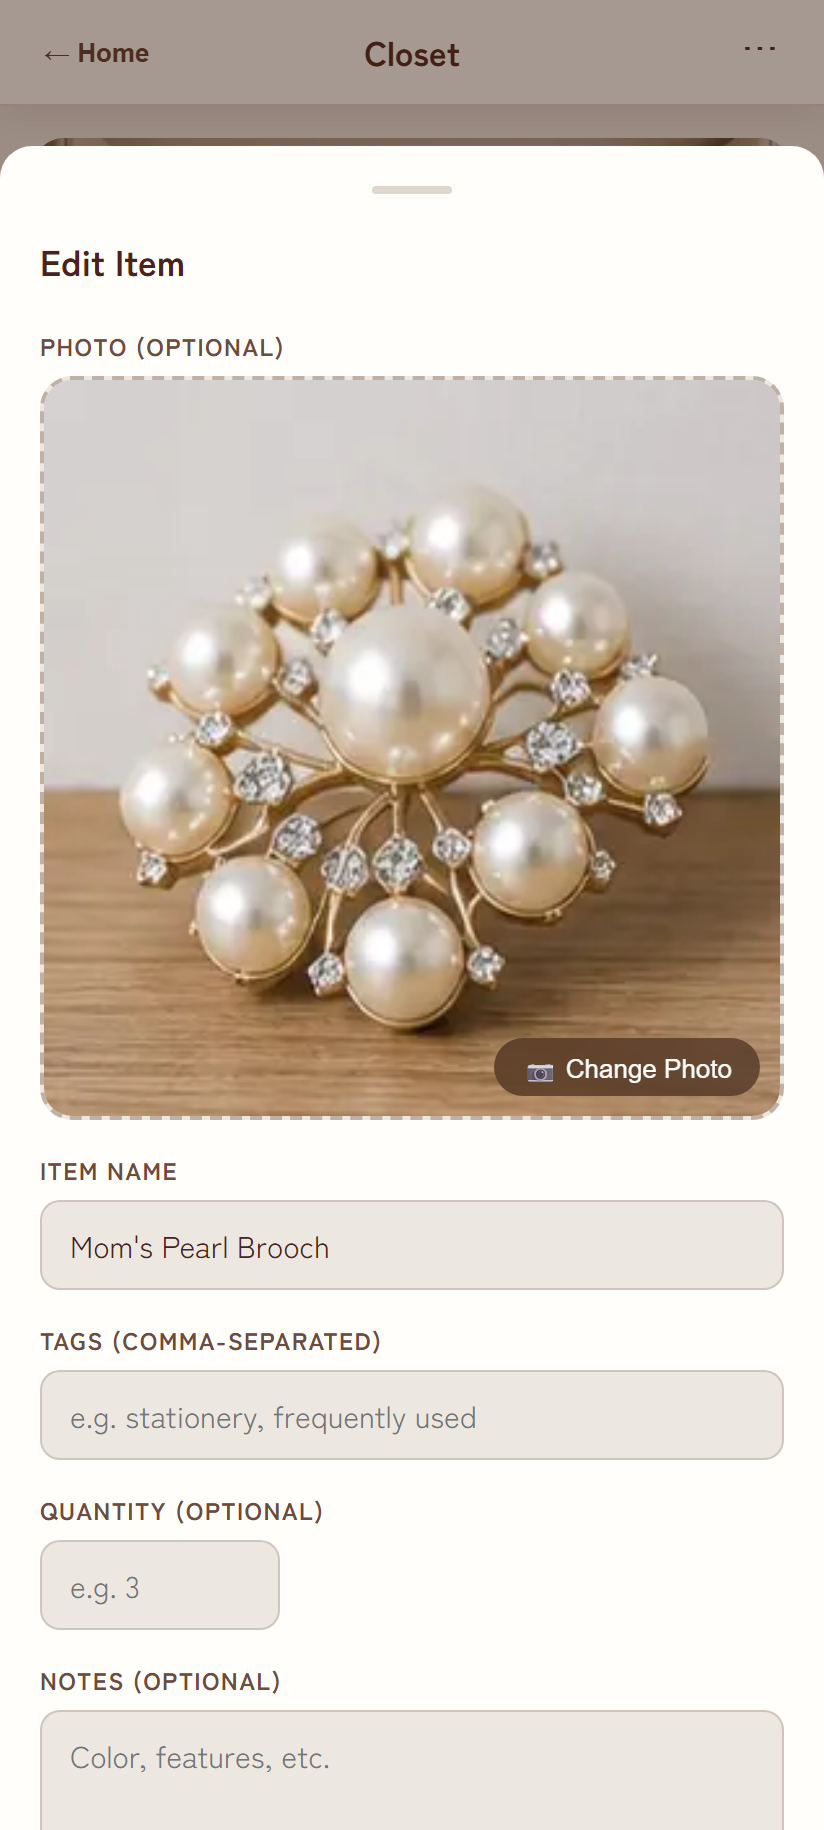
| Field | Required | Description |
|---|---|---|
| Photo | Optional | Tap to launch the camera. One photo per item |
| Item name | Required | e.g. Scissors, Stamp, Batteries |
| Tags | Optional | Enter multiple, separated by commas (e.g. "stationery, frequently used"). Included in search. A space is not treated as a separator, so a multi-word tag like "board games" stays as a single tag |
| Quantity | Optional | An integer of 0 or more. If entered, a badge like "×3" appears in the list |
| Notes | Optional | Color, features, and so on. Multi-line input allowed. Included in search |
Frequently used tag suggestions
Below the tags field, up to 12 of your most frequently used tags appear as tappable chips, ordered by frequency. Tap one to add it to the tags field instantly — this helps prevent inconsistent tagging, like typing "stationery" one time and "office supplies" another time for the same thing. Tags already entered aren't shown as suggestions.
3.4 Editing, moving, and deleting items
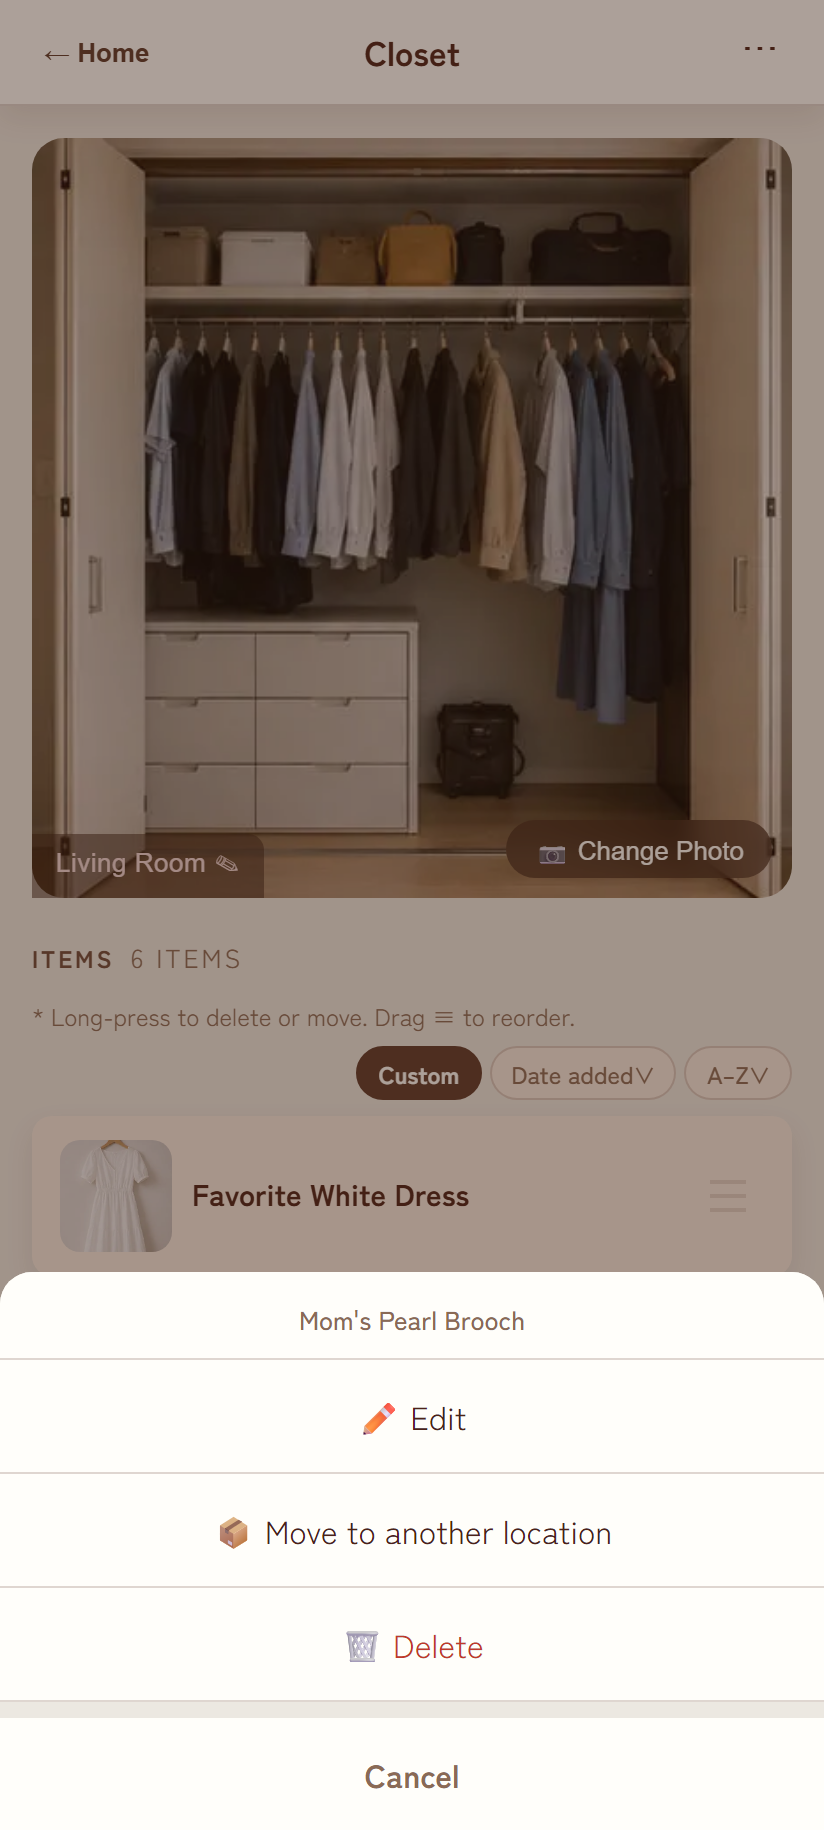
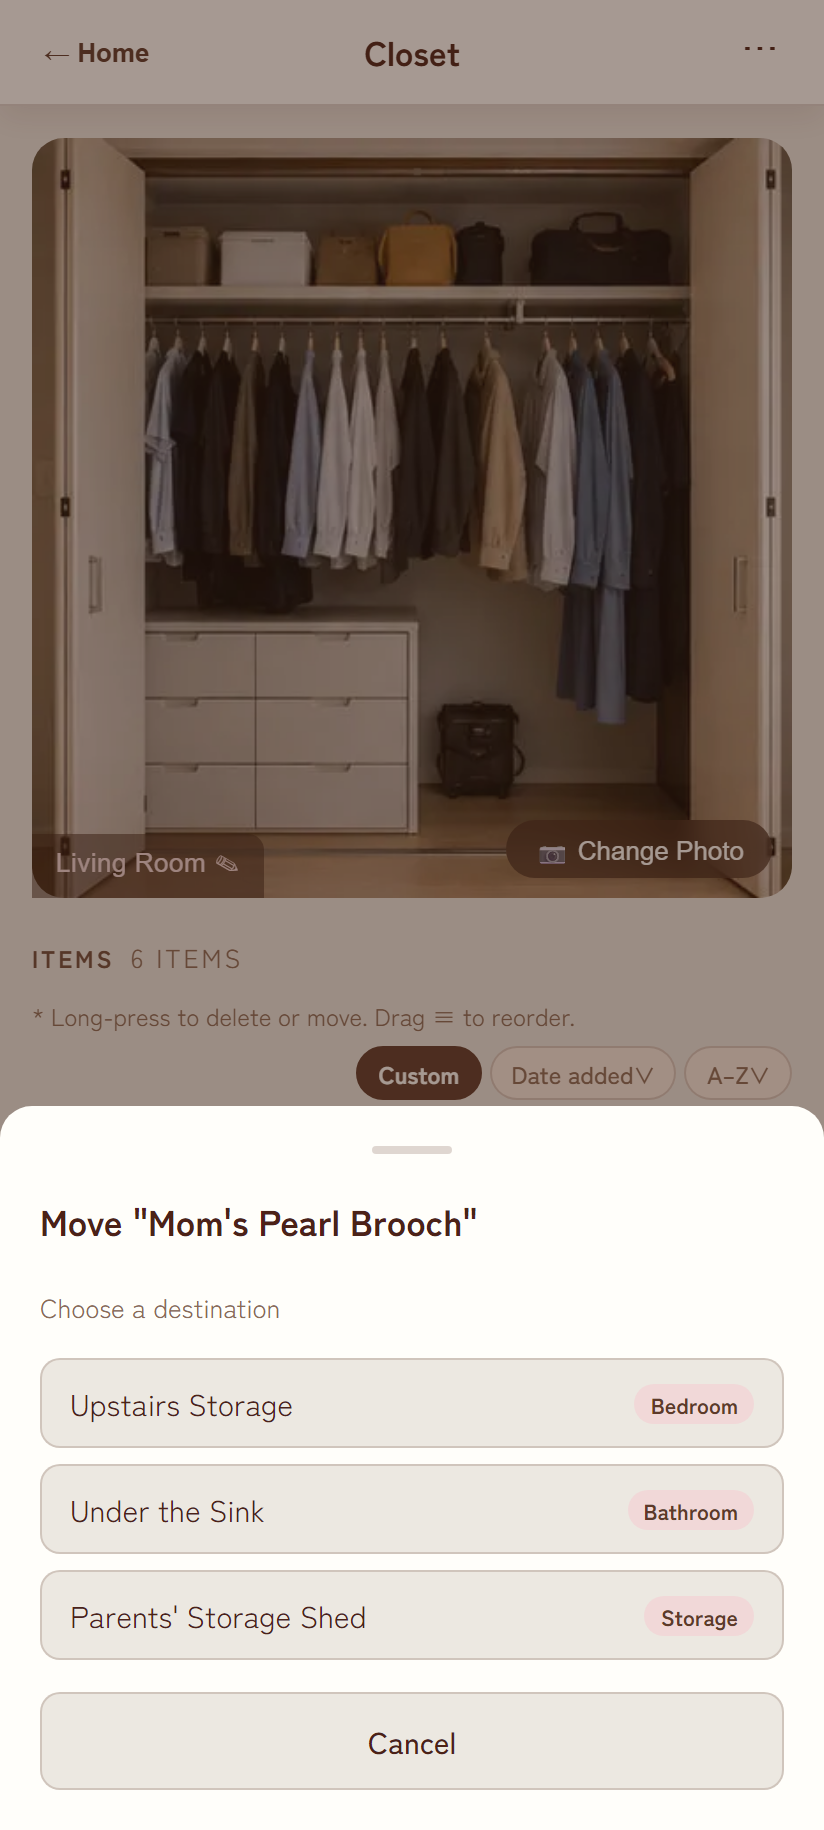
| What you want to do | How |
|---|---|
| Edit | Just tap the item row (or long-press → ✏️ Edit) |
| Move to another location | Long-press → 📦 Move to another location → choose a destination. It's placed at the end of that location's list |
| Delete | Long-press → 🗑️ Delete, or Delete this item at the bottom of the edit modal |
Confirmation flow when deleting an item
(Keep / Delete)
For an item with no photo, the second step is skipped and deletion finishes at step 1.
3.5 Reordering items
Just like the home screen, you can switch between CustomDate addedA–Z using three buttons. Only while in Custom order can you drag the ≡ handle at the right edge of a row to change its position. The sort bar's three buttons only appear when there are 2 or more items.
4. Camera & photos
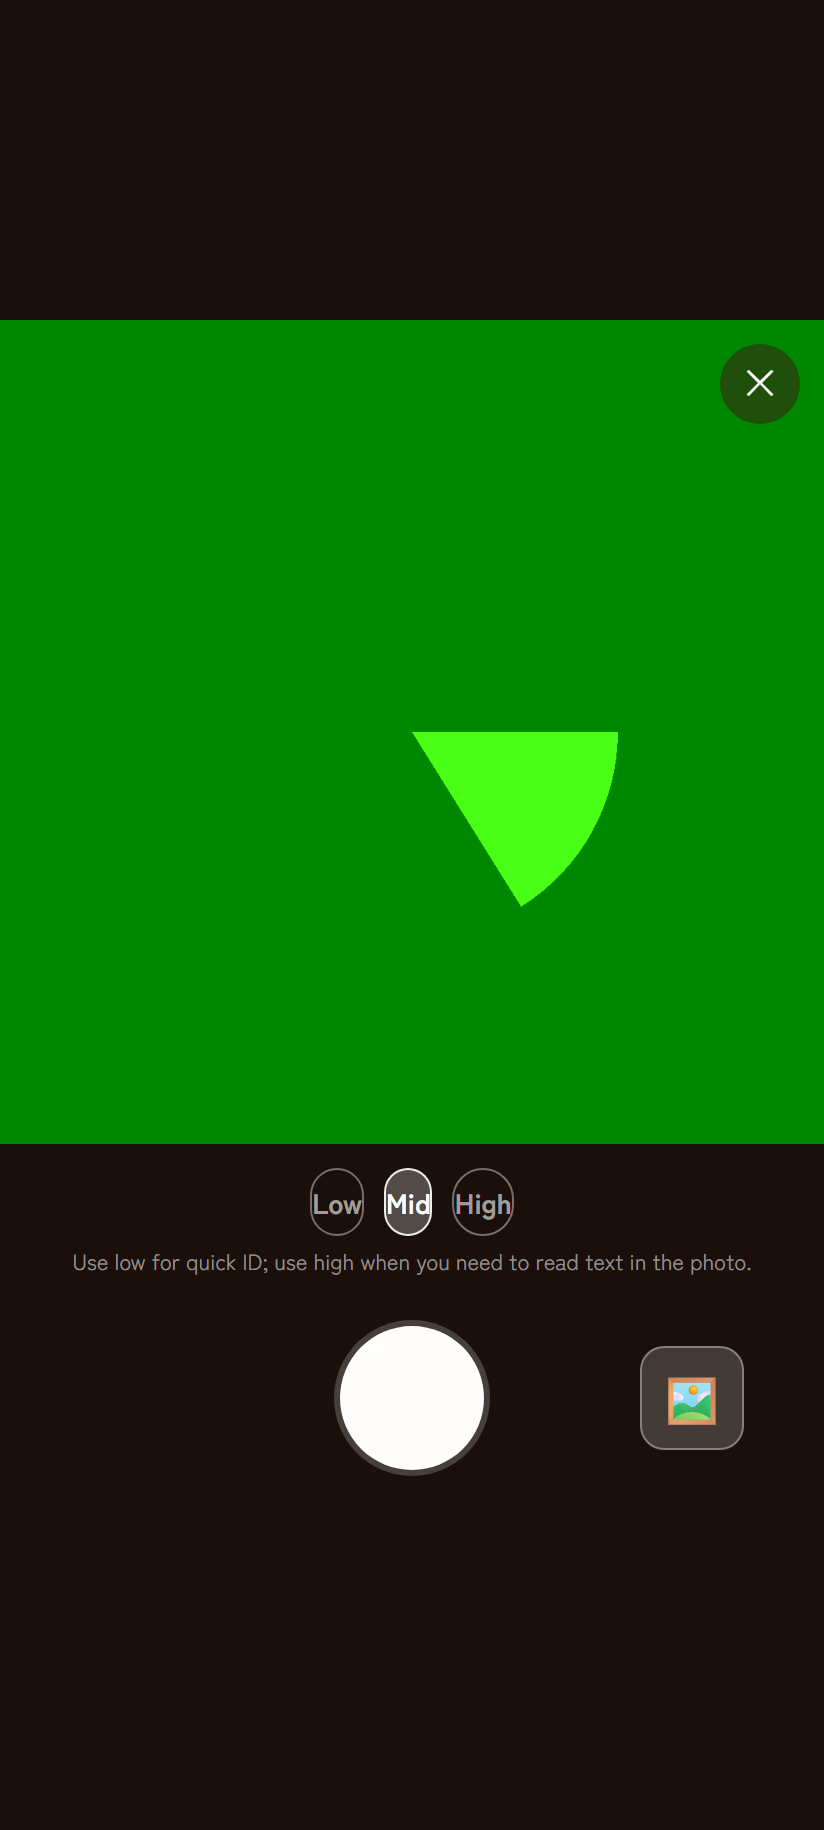
※ This image was captured in a development environment, so the viewfinder shows a test pattern (a green circle) rather than a real camera feed. On an actual device, you'll see live camera footage.
Screen elements
| Element | Details |
|---|---|
| Square viewfinder | A 1:1 frame. What actually gets saved is a square crop taken from the center of the frame |
| Top-right ✕ | Closes the camera |
| Quality LowMidHigh | The quality of the saved image. Defaults to "Mid" |
| Center white circle | The shutter button |
| Bottom-right 🖼️ | Choose an existing photo from your device's gallery (compressed to the same quality as a fresh shot) |
| Bottom-left 🔄 | Switch camera (front/back). Only shown on devices with 2 or more detected cameras |
Choosing a quality level
As the note at the bottom of the screen says, use low quality for things you just need to recognize, and high quality when you also want to read text in the photo.
| Setting | Rough size | Good for |
|---|---|---|
| Low | ~100KB or less | Things you can recognize by shape and color (clothing, boxes, tools, etc.) |
| Mid (default) | ~250KB or less | Most use cases |
| High | ~500KB or less | Things where you want to read a label, model number, or instructions |
When the camera isn't available
- If permission was denied: "Camera permission required" is shown. Follow the on-screen instructions: go to Settings › Apps › Docco › Permissions › Camera and set it to "Allow," then tap Retry.
- If the camera API itself is unavailable: "Camera not available. Please select a photo file." is shown, and it switches to 📁 Select File for choosing from your gallery.
5. Search
| Item | Behavior |
|---|---|
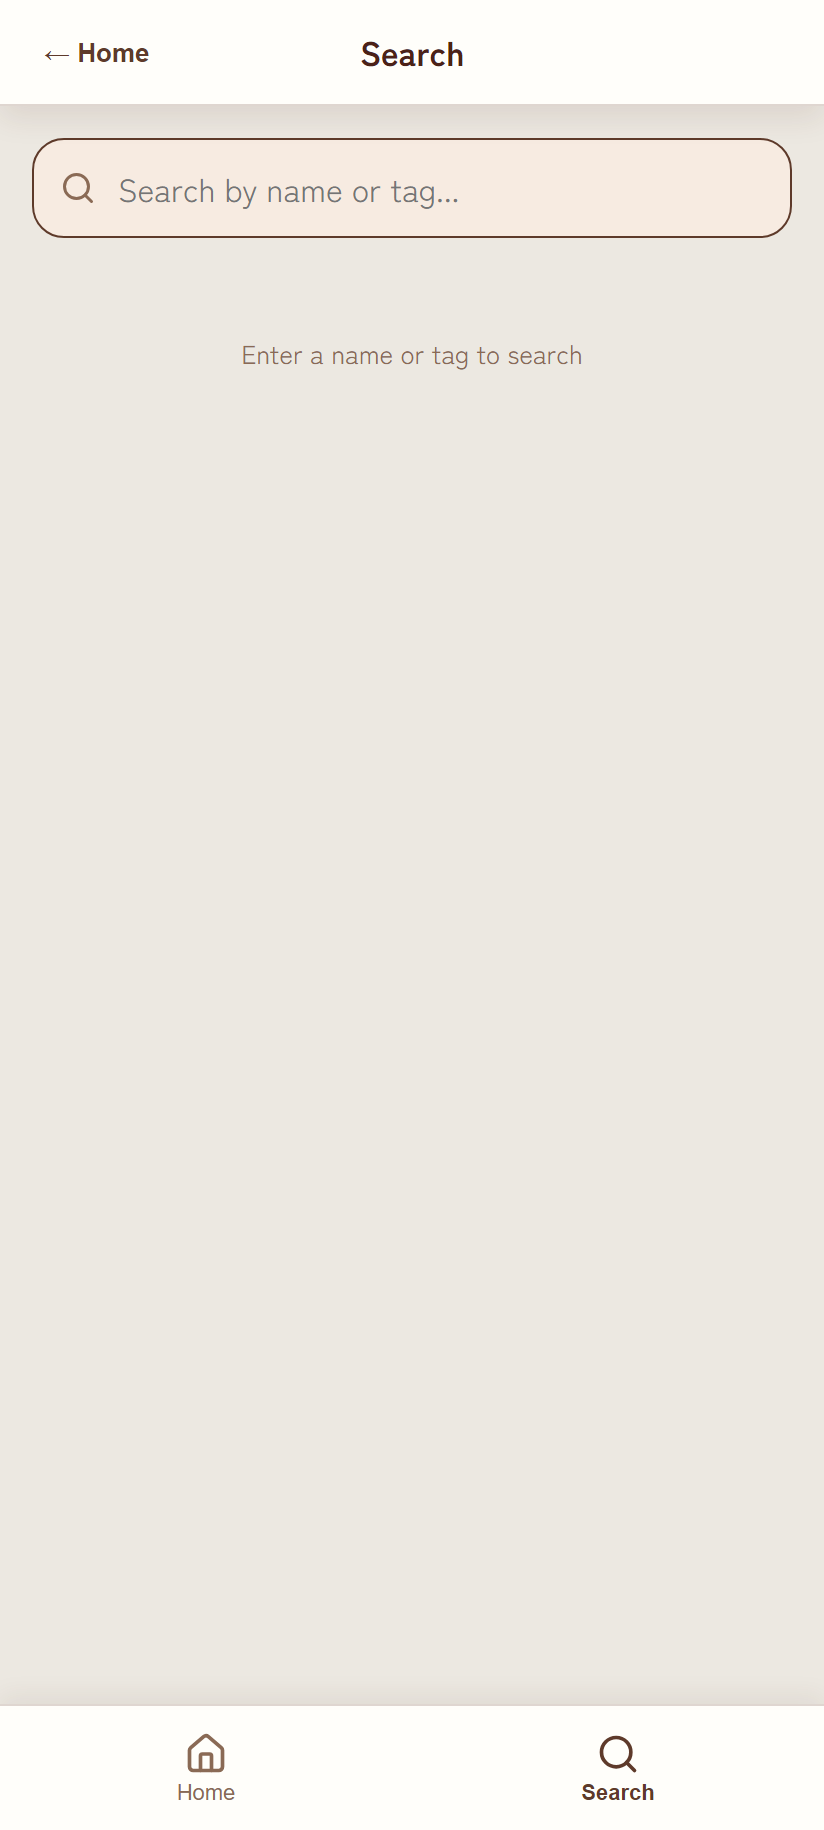
| Search scope | Item names, tags, and notes — these three only. Location names and category names are not searched |
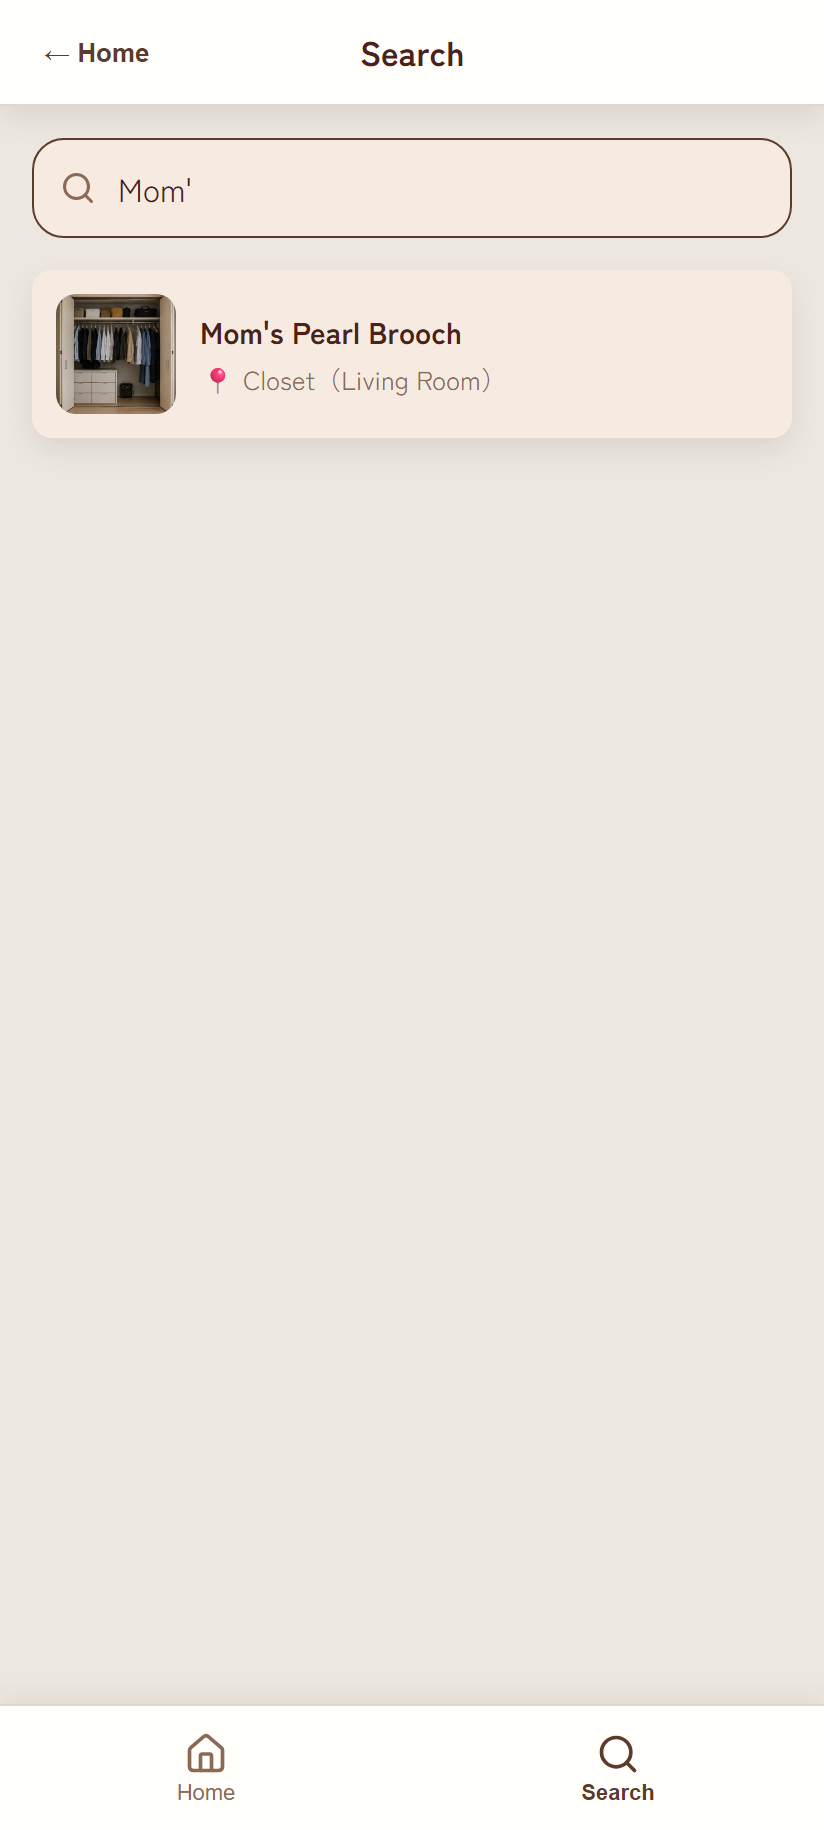
| Matching | Partial match. Results narrow down as you type, character by character. Search ignores differences in uppercase/lowercase, accent marks, hiragana/katakana, and full-width/half-width characters |
| Result display | Location's photo thumbnail / item name / quantity badge / 📍 location name (category) / tags |
| Tapping a result | Jumps to the detail screen of the location that item is in |
6. Managing categories (location types)
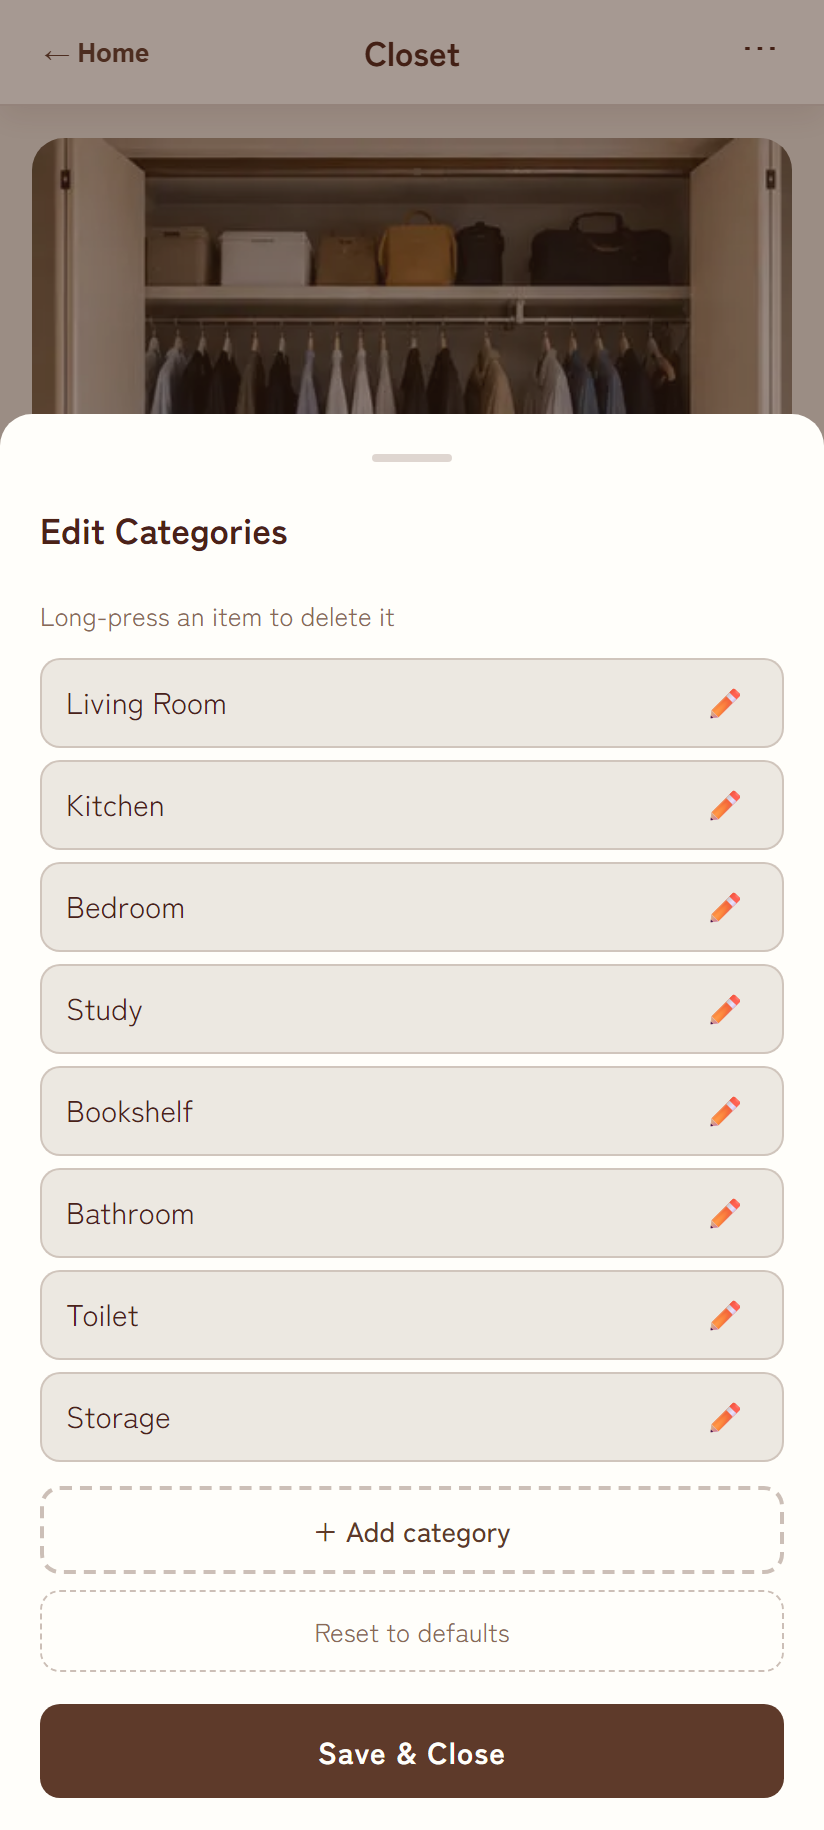
How to open it
Location detail screen → category badge at bottom-left of the photo → Edit categories...
What you can do
| Action | How |
|---|---|
| Rename | Tap the ✏️ on the right → type → confirm with Enter or by tapping outside |
| Delete | Long-press the row → tap Yes for "Delete this category?" |
| Add | + Add category → type → Enter |
| Reset to defaults | Reset to defaults |
| Confirm changes | Save & Close. Changes aren't saved until you press this |
The default categories in English are Living room, Kitchen, and Closet — 3 in total. You can also add a new one on the spot from the category picker shown when adding a location (see 2.2).
7. Switching language
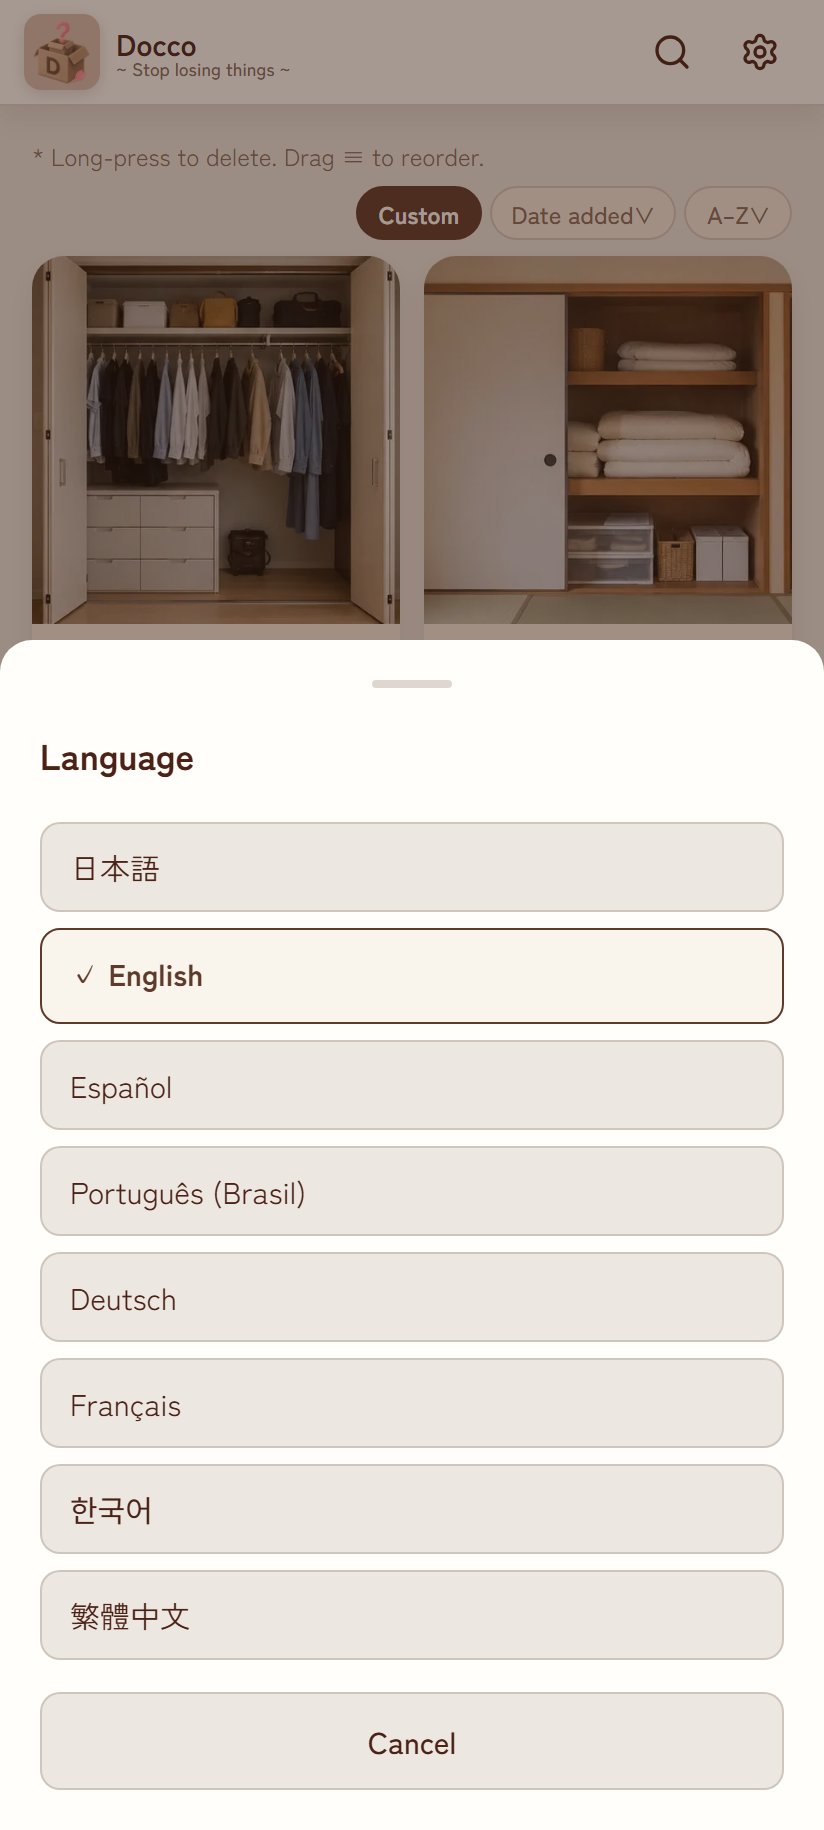
✓ marks the currently selected one.Switch it from Home screen → gear icon → 🌐 English / Language. The whole app switches the instant you pick one, and your choice is remembered on your device.
| Code | Name | Code | Name |
|---|---|---|---|
ja | 日本語 | de | Deutsch |
en | English | fr | Français |
es | Español | ko | 한국어 |
pt | Português (Brasil) | zh-TW | 繁體中文 |
8. Troubleshooting
"Session expired" appears
For security, the connection between Google and Docco expires after about an hour. When expiration is detected, a reconnect prompt appears layered over the screen.
- Tapping Reconnect to Google takes you through Google's sign-in screen and back to right where you were.
- Anything you were in the middle of typing is preserved. The reconnect prompt just sits on top of whatever modal is open — the screen underneath is never closed.
- In rare cases, tapping Reconnect to Google doesn't respond, but even then it automatically resets after about 15 seconds so you can tap it again.
Error messages
| Message shown | Cause & fix |
|---|---|
| Authentication expired. Please sign in again. | Your access token expired. Follow the reconnect prompt |
| Google Drive access denied (storage full or permission error). | Your Drive is out of space, or permission was revoked. Check your Drive storage, or sign out and sign in again |
| Too many requests. Please try again in a moment. | Rate-limited by Google. Wait a bit and try again (the app also automatically retries up to twice) |
| Google server error. Please try again in a moment. | A temporary problem on Google's side. Wait a bit and try again |
Errors appear as a toast at the top of the screen and disappear automatically after 5 seconds (tapping one also dismisses it right away).
Other notes
- Signing out doesn't delete your data. It stays in the
Doccofolder on Google Drive, so signing back in with the same account brings everything back. - Accidentally deleted photos can be restored from Google Drive's Trash (Docco never permanently deletes anything). Note that the app's own link between the photo and the item is lost, so after restoring a photo you'll need to attach it again.
- The Android back button steps back through modal → previous screen → home screen, in that order; pressing it once more from the home screen exits the app. Small pop-ups such as the settings menu, language picker, and category picker close on their own, without leaving the current screen.
9. App updates
If you installed the app from Google Play, whenever a new version is published it starts downloading automatically in the background while you use the app. Once it's ready, a notice appears at the bottom of the screen.
| What's shown | Details |
|---|---|
| "A new version is ready" | A signal that the download has finished. Shown small at the bottom of the screen so it doesn't get in your way |
| Restart to update | Tapping it restarts the app on the latest version. You can also keep using the app as-is if you'd rather update later (you'll be prompted again next time you launch it) |